North Ronaldsay wool

Recently there was the unveiling of a rather special piece of tartan, dating between 1500 and 1600, it’s a twill weave with a complicated 4 colour sett, and is the earliest piece of true tartan found in Scotland, it’s all been rather exciting and I look forward to seeing it later in the year.

photo: Alan Richardson V&A Dundee

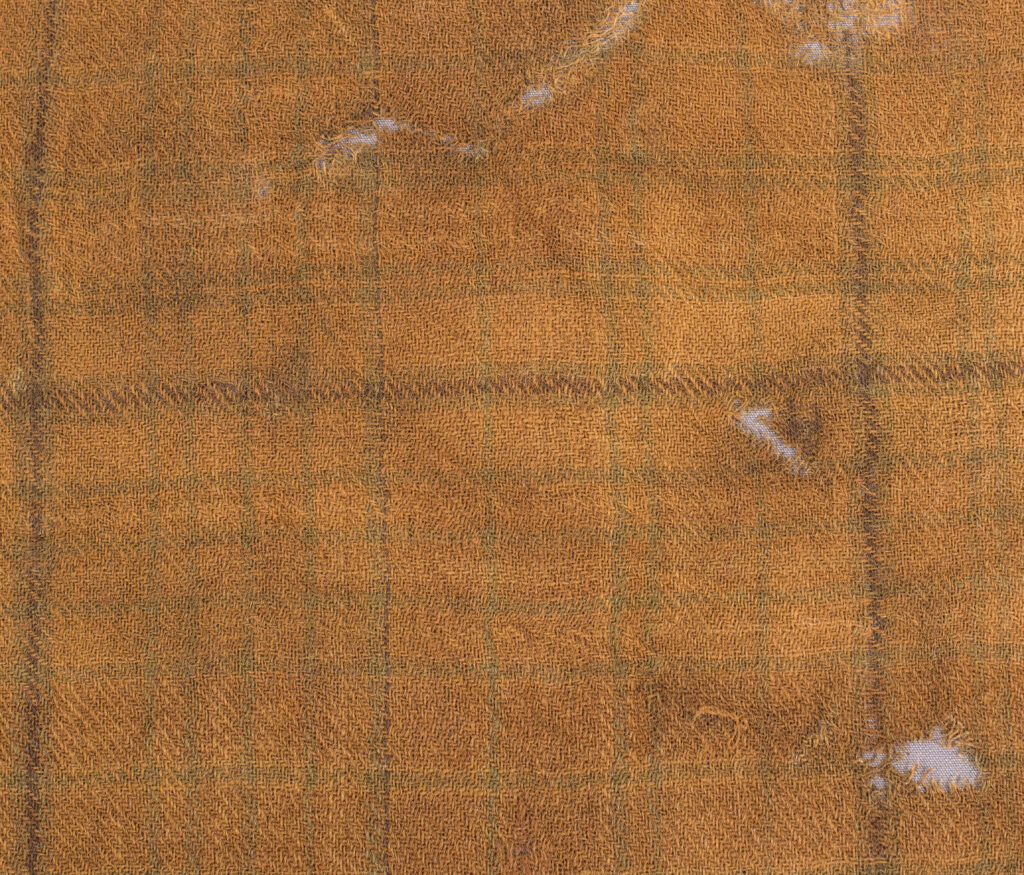
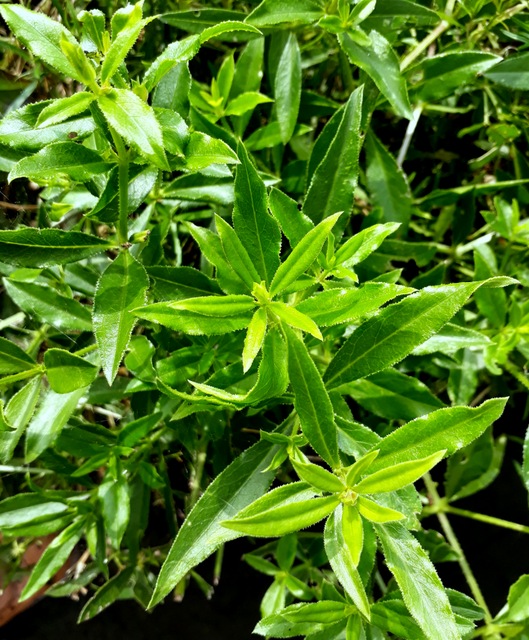
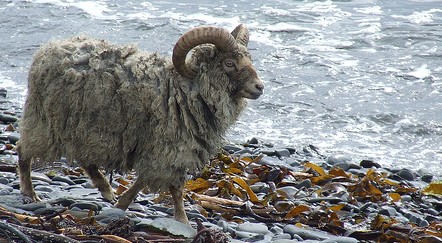
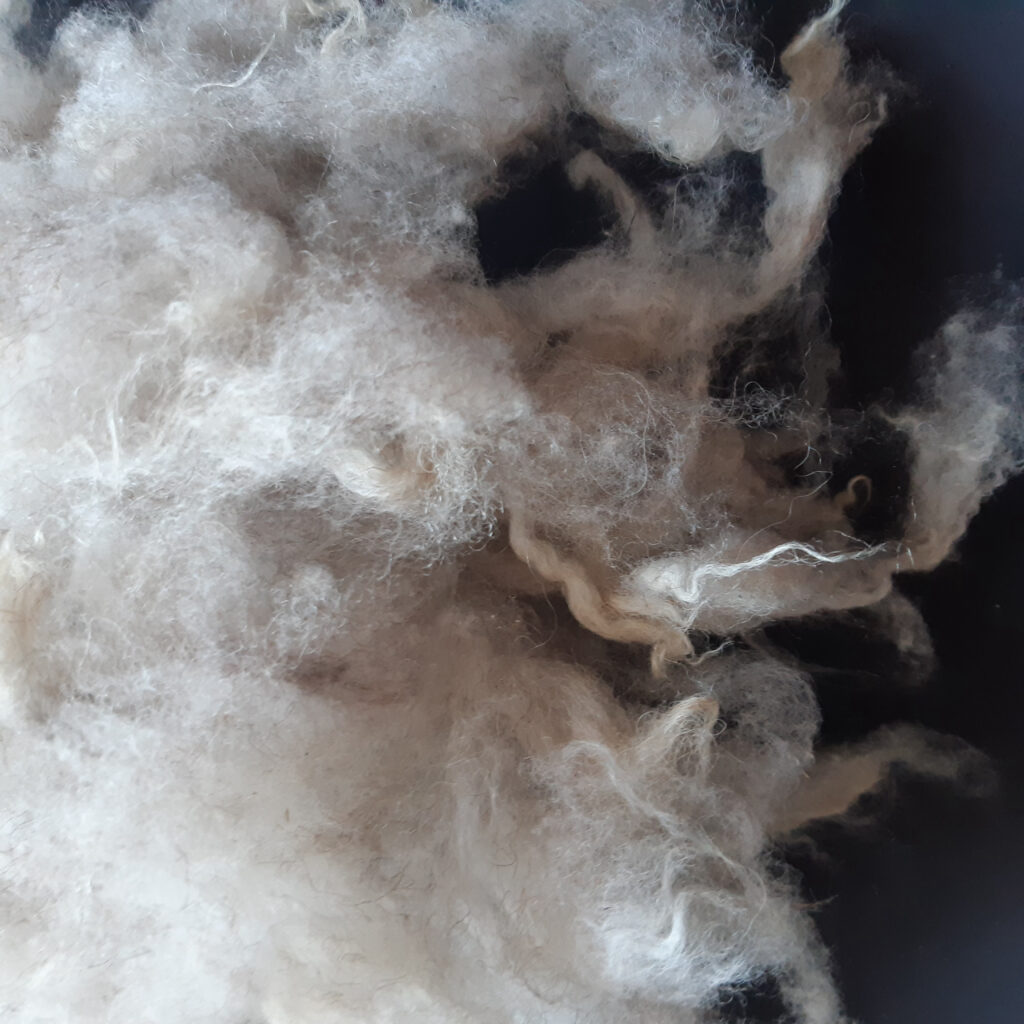
For some time I’ve been thinking of spinning and weaving a little sample of an early tartan and this discovery has spurred me on, whether I do a copy of “it” or something along the lines I haven’t yet decided, but it is the current source of inspiration. Obviously hand spun using drop spindles – the wheel hadn’t made it to Scotland at that time, and as drop spinning is a particular favourite of mine I’m more than happy to start making metres of yarn. The type of sheep used is important, the likely original one was most likely the Scottish Dunface, it no longer exists, but the North Ronaldsay is similar, it’s still available although classed as a rare breed. They are unusual as they live on the beach, surviving on seaweed as opposed to grass, so rather special. They aren’t a large sheep, and are often tan or cream, with darker areas, but can give a reasonably white yarn once finished. I’ve always been keen on processing my own wool, and that means starting with a fleece, I haven’t (yet) sheared any, but it might still happen.

I’m going through the entire process from fleece to yarn, it’s much the same for any fleece really, it’s my usual way of cleaning and preparing almost any yarn from a single fleece – for multiple fleeces I often choose a slower but much more eco way, but more of that for another time.

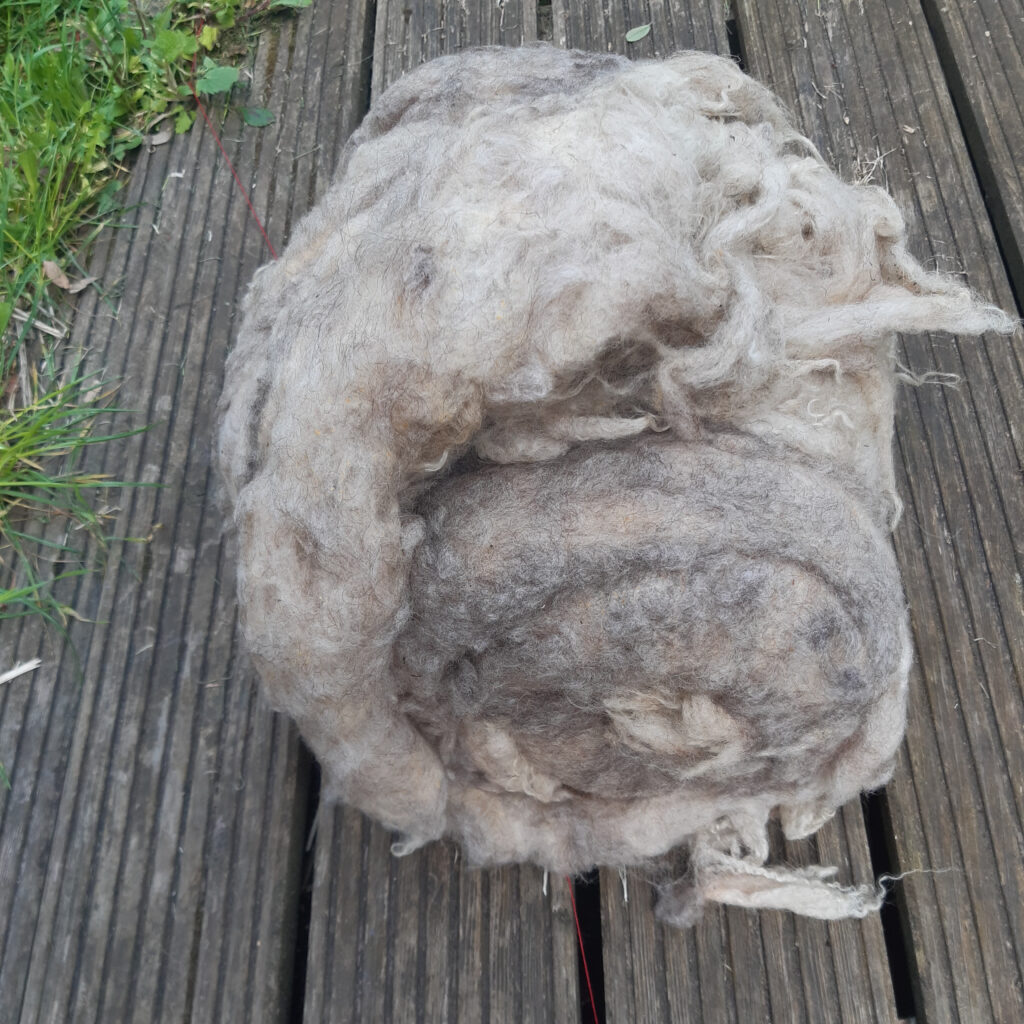
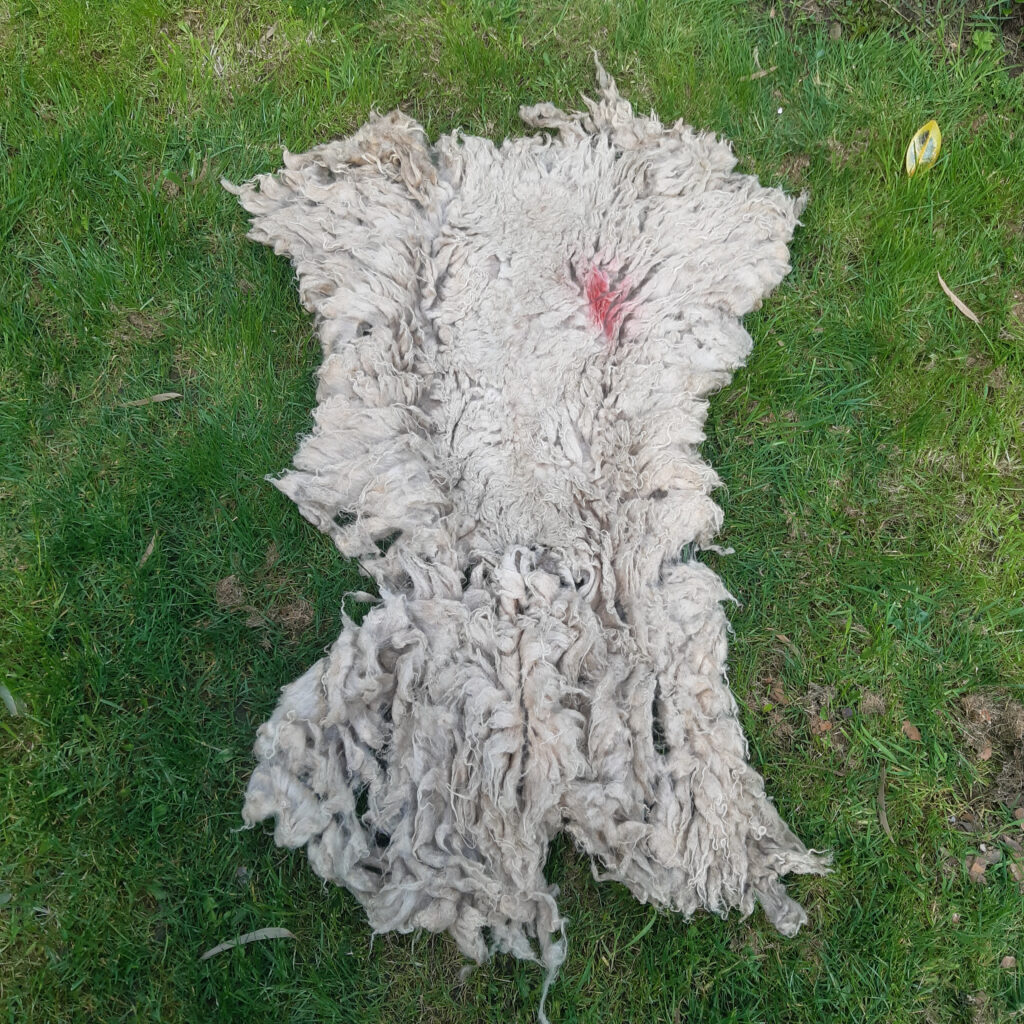
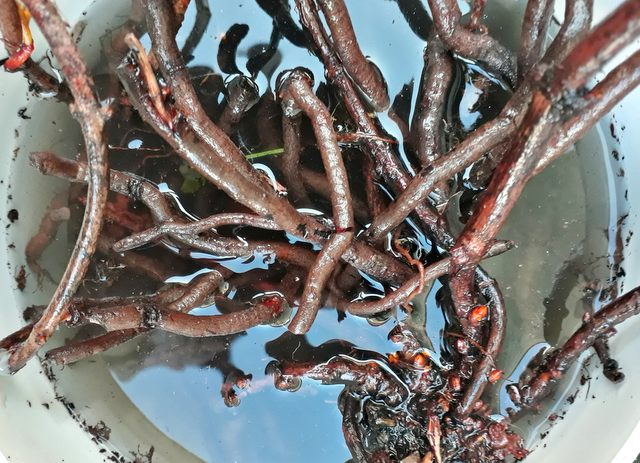
The fleece is generally rolled into a nice tight bundle, it has already been skirted to remove the worst of the daggy bits and rough or torn edges, so after checking it over, it’s time for a soak. This fleece was just under a kilogramme so not difficult to manage. I’ve learnt over the years that an overnight soak in a large bucket of cold water does such a lot of good, it softens any mud or debris, and helps to loosen up the fibres.

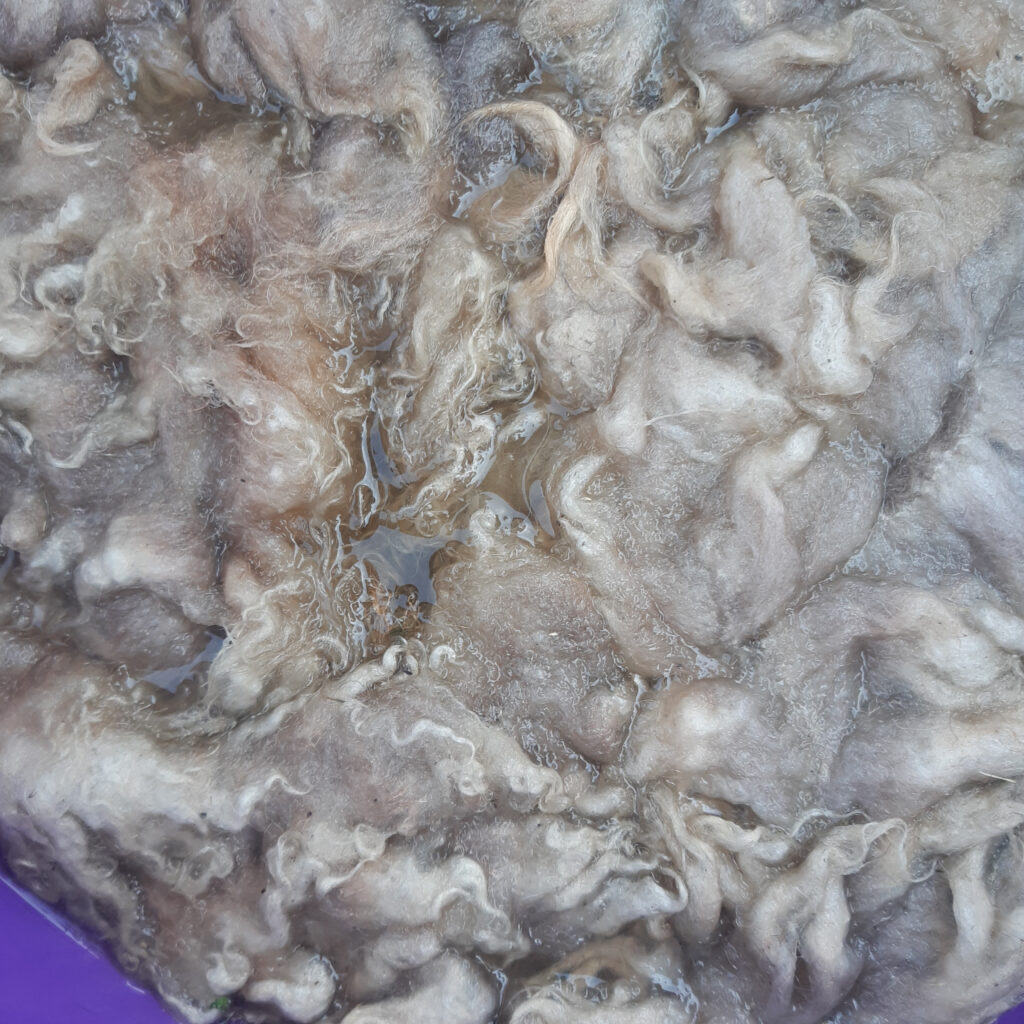
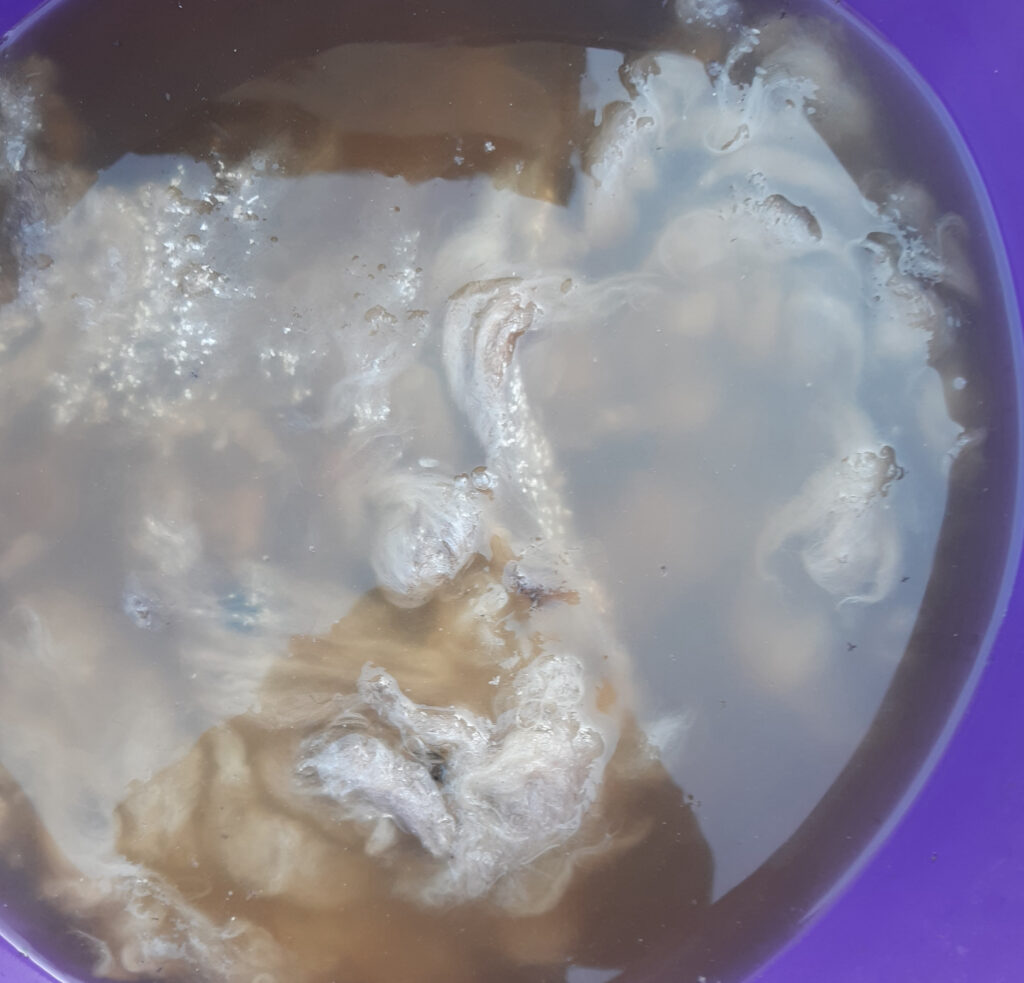
It doesn’t get agitated too much , just to make sure it is all under the surface, sometime I confess that it takes a few days to work on all of any fleece, but there isn’t any harm in letting it sit a bit longer. The next day I take a large handful, drain or squeeze it to remove as much dirty water as I can, then using a smaller bucket with a little cheap detergent dissolved in some just warm water, I put the fleece in and very gently move it around, I’m feeling for any bits of vegetable matter – or similar and remove them and also any hardened clumps of wool or obvious short cuts. Often I will then do a fairly hot wash with a little more soap, a little hotter than hand heat to remove some of the lanolin, each fleece is different and each spinner prefers a different level of the grease. The North Ronaldsay has a reasonable level of lanolin already so I want to leave just enough in to make the spinning pleasant. Several rinses later and all at similar temperatures as you don’t want the lanolin to redeposit, it is taken out, drained and left to dry which can sometimes take a few days depending on the weather. A lot of this processing is best done outside, it’s a fairly wet and messy job but the garden does appreciate the enriched soaking water.

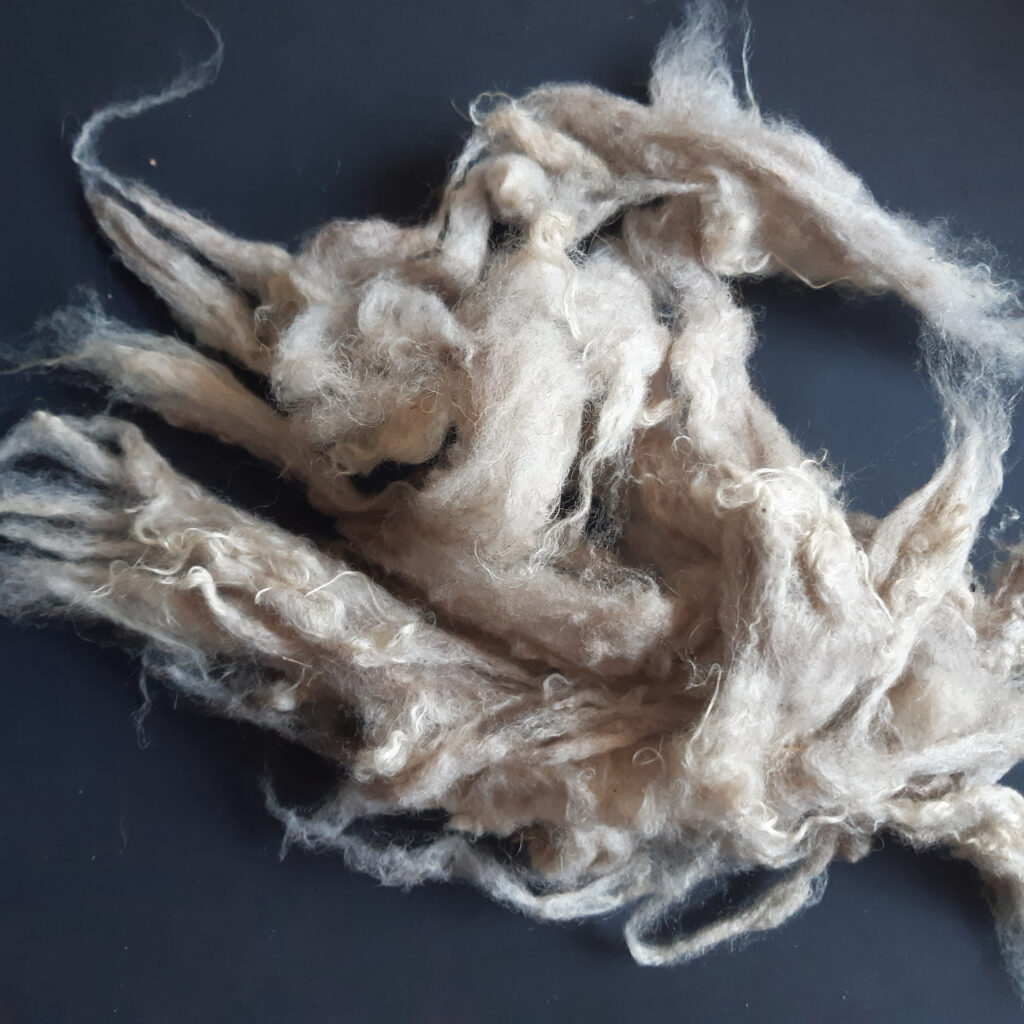
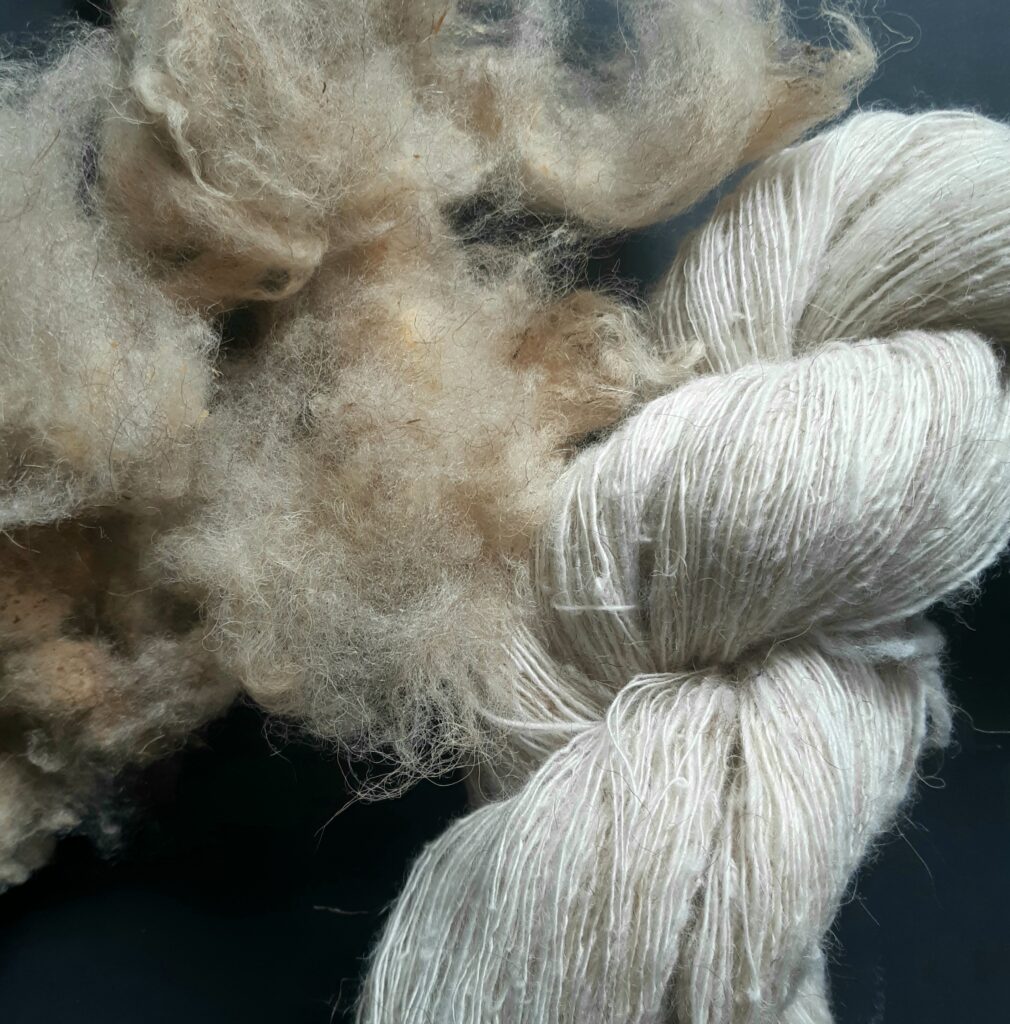
Once dry the fleece may well have clumped together a little, so it needs to be teased or picked apart to make the next process easier, basically just pulled to open up the fleece so it begins to look fluffier.

The next decisions are to whether to card or comb it and how to spin it , all the options give a different final result. There are two main ways to prepare wool fibre for spinning, each has advantages and disadvantages, and they go towards different types of finished yarn – carding or combing.

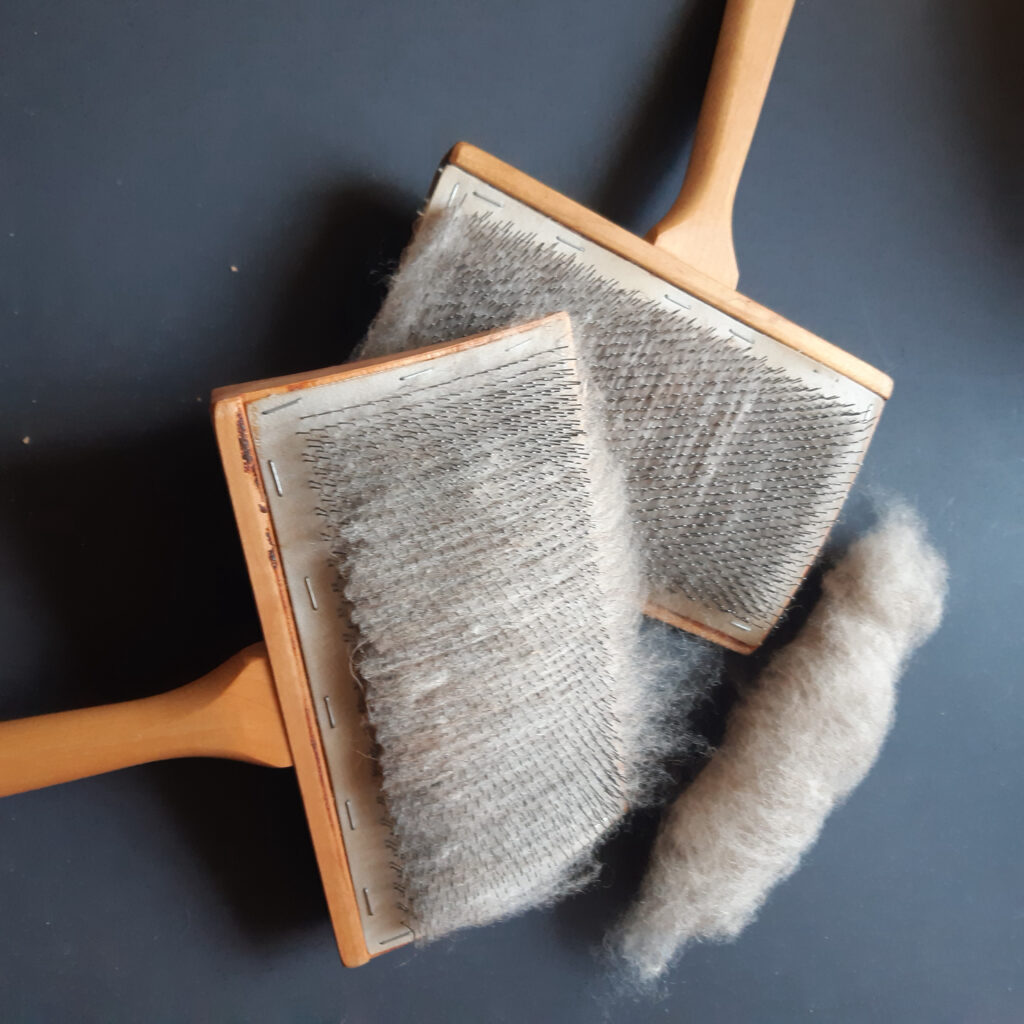
Carding uses a board with fine metal wires and aligns the fibres , it uses all the fibre – shorter and longer ones but is best for fibres no longer than 4″-5″, this mat of fibres is used rolled up across the direction of the alignment, so that all the direction is cylindrical and generally fairly loosely wrappt, the resulting sausage of fibre is now called a rolag. This is then spun from the end and is known as a woollen preparation. This uses almost every bit of the fibre with virtually no waste and is ideal for knitting, it makes a softer, fluffier,lighter, and warmer yarn.

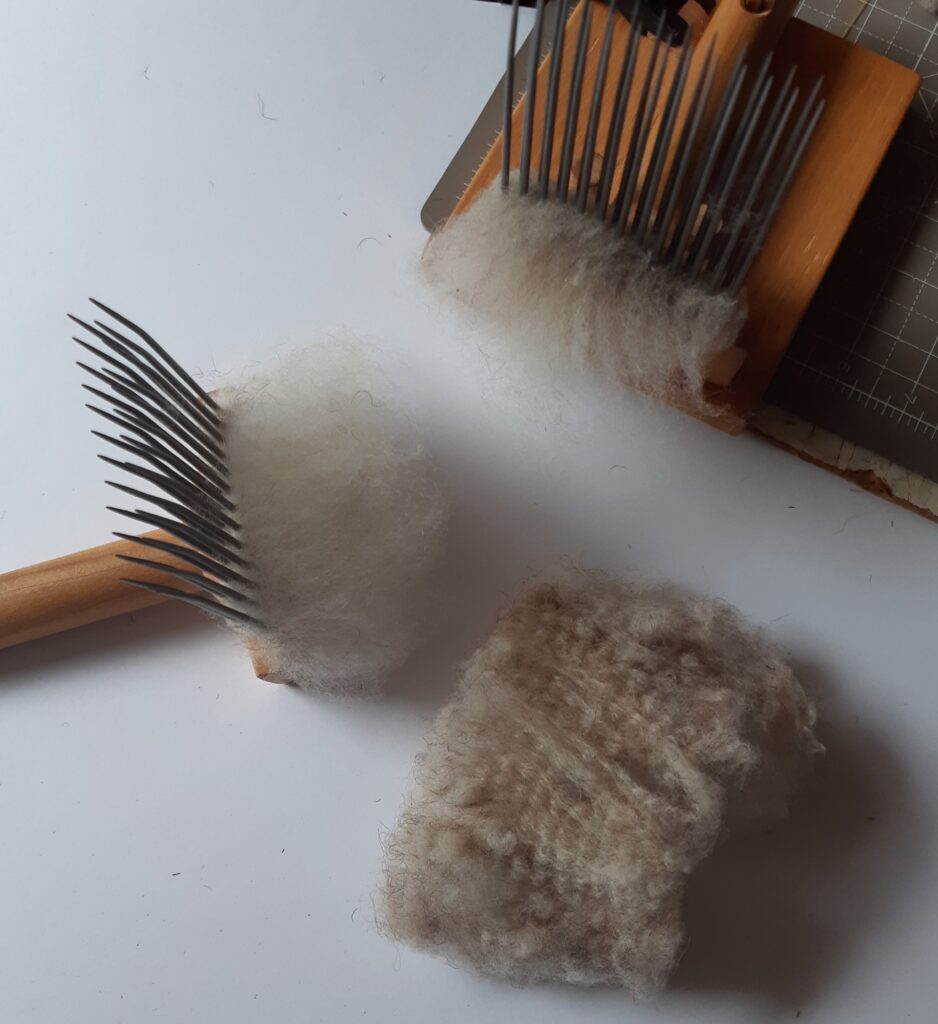
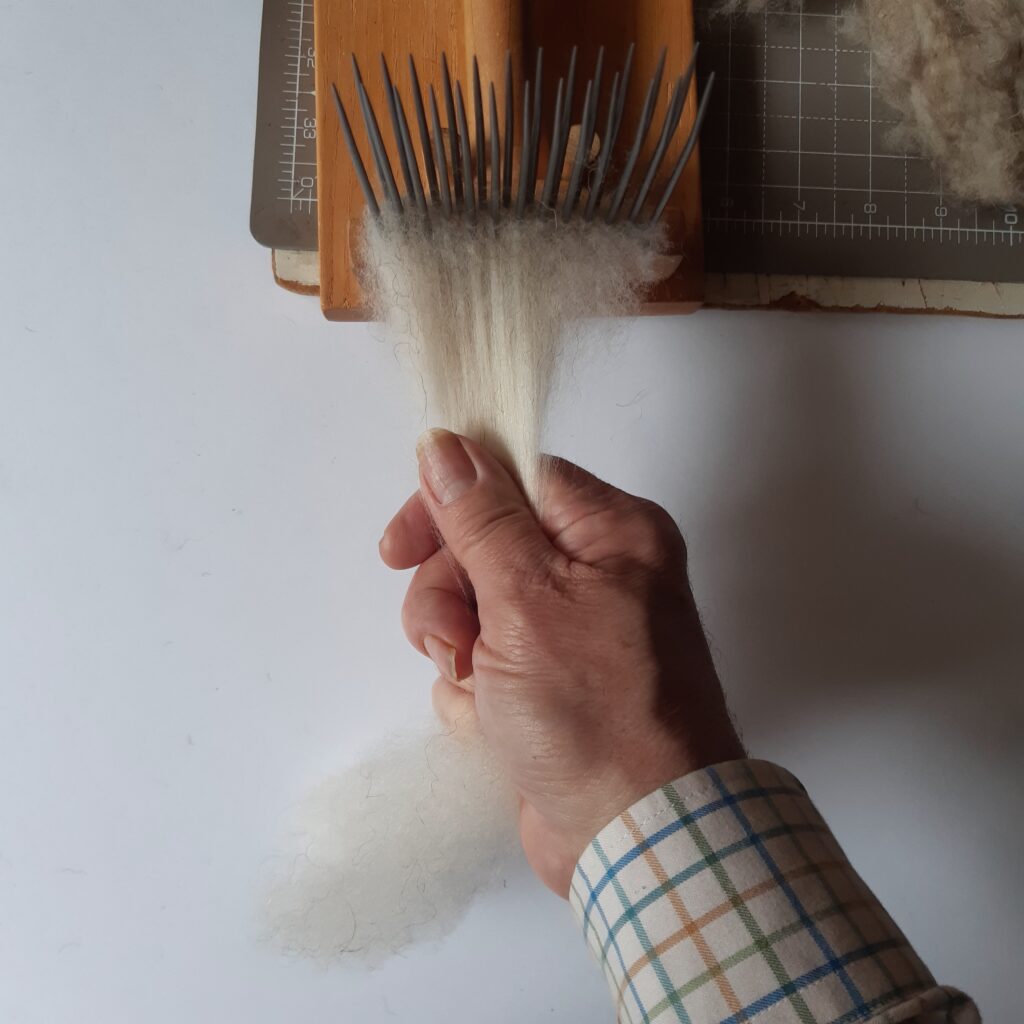
The other preparation is combed, two sets of sharp fine angled nails arranged in pairs, the fibre is laced in one fixed comb and the other comb is swipped against the tines ( but not touching) picking up the longer fibres, this is continued until the first comb no longer gives up any more fibre it is then emptied and then swapped and the process repeated several times, the fully loaded comb is then locked down and the fibre is pulled off in a long strip, now known as top. This has all the best fibres arranged in parallel and the shorter ones have been left behind. Combing is the perfect preparation for weaving finer cloth, it does however leave a lot, perhaps 50% of fibre behind, but that can then be carded for woollen use, but tends to be a little chunkier or fuzzier than the rolags prepared from the original fibre.

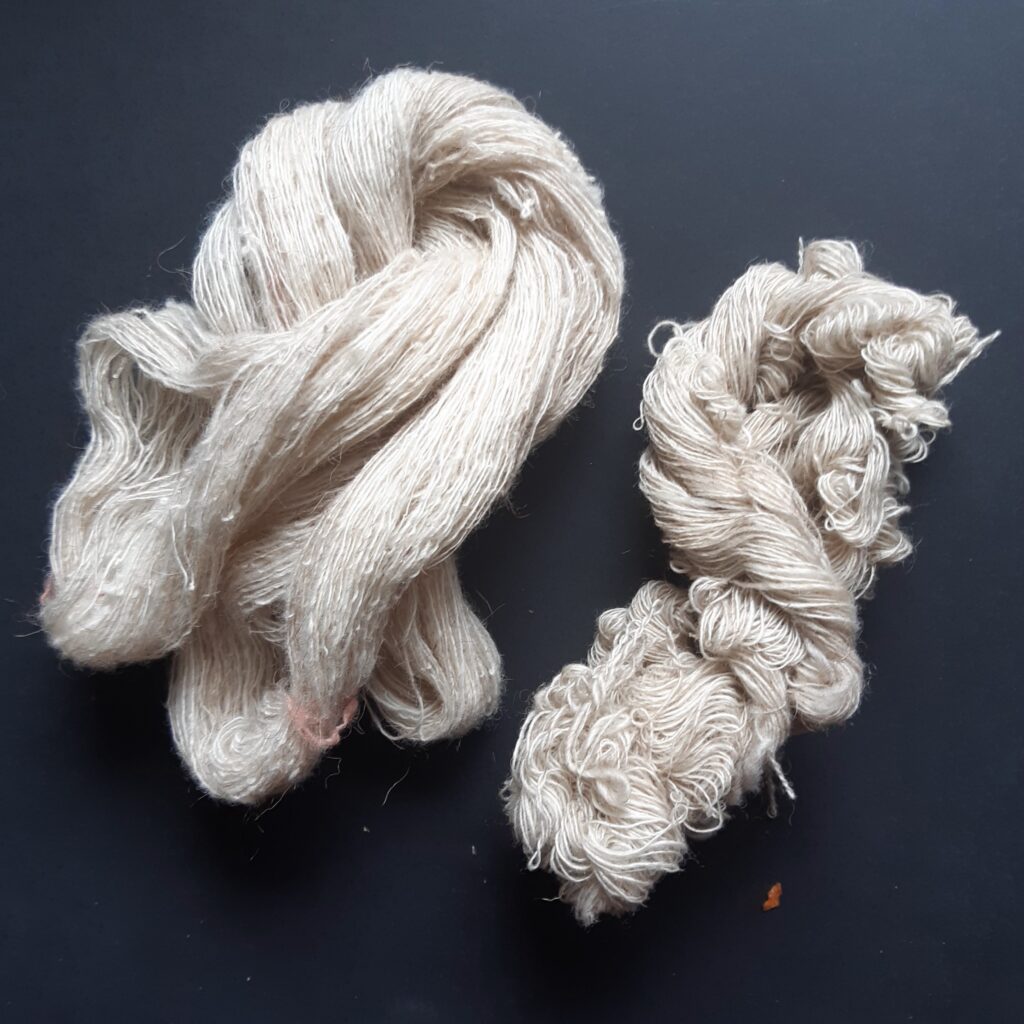
We now have two different preparations of fibre, carded rolags, combed tops, and also the carded waste from the combings. Each of these can be spun either with a drop spindle or a wheel, and can be spun with a tight twist or a looser twist on either, so lots of possibilities for different yarns.

Samples of the different preparations with drop spindle spun single yarns
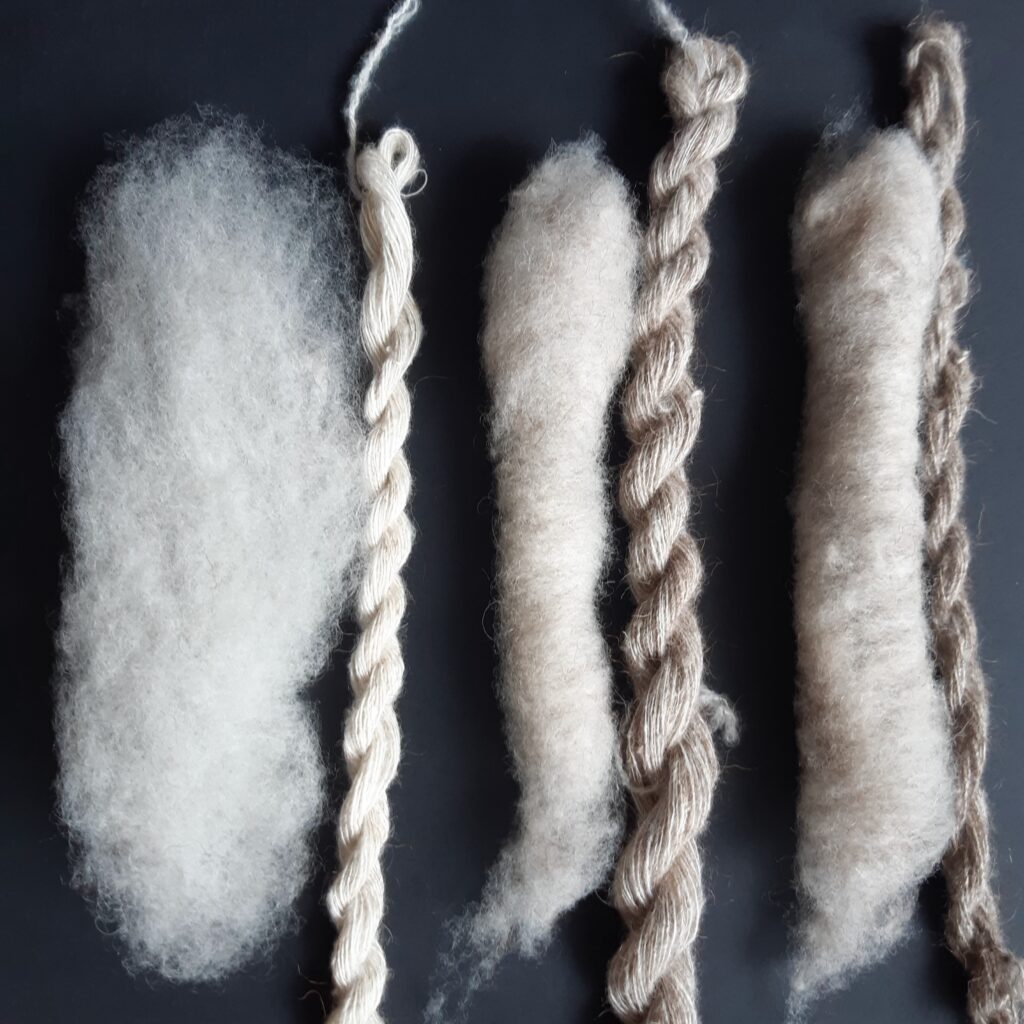
Left – Combed-almost white fine hard yarn
Centre – carded- ecru soft open yarn
Right – Carded from combed waste- dark ecru slightly neppy hairy yarn

So the decision in this case would be the combed prep, it’s almost white, which is important as there will be several colours to be dyed, and it’s smoother for weaving. The carder version with the complete fleece might work but when dyed will take the colour differently, interestingly perhaps but for this project the colours need to be purer. The re-carded version is fluffier and hairier so perhaps more suited to outer wear rather than skin soft, or perhaps even felted and used for rugs or blankets.

For this project I’ll be spinning on a simple drop spindle with a tight twist as it needs to be strong and fine.
The drop spindle would have been used up to the 1500’s, perhaps even later in Scotland. The treadle spinning wheel didn’t appear much before 1200 in the rest of the world, and it was slow to be adopted. Various thoughts that the spinning wheel is faster than the spindle are correct – if the spinner is seated and working, but the spindle is portable, light and easy to carry, and can be used almost anywhere, so over the course of a week there might not be much between the two. In the early years where a “great wheel”, a simple hand turned large wheel, was used it was actually forbidden by law to use that yarn as warp, only as weft where strength wasn’t so important, so drop spinning was very important at that point, of course things changed with the invention of spinning machinery.

drop spun complete carded fibre, slightly cream
drop spun from combed fibre, almost white

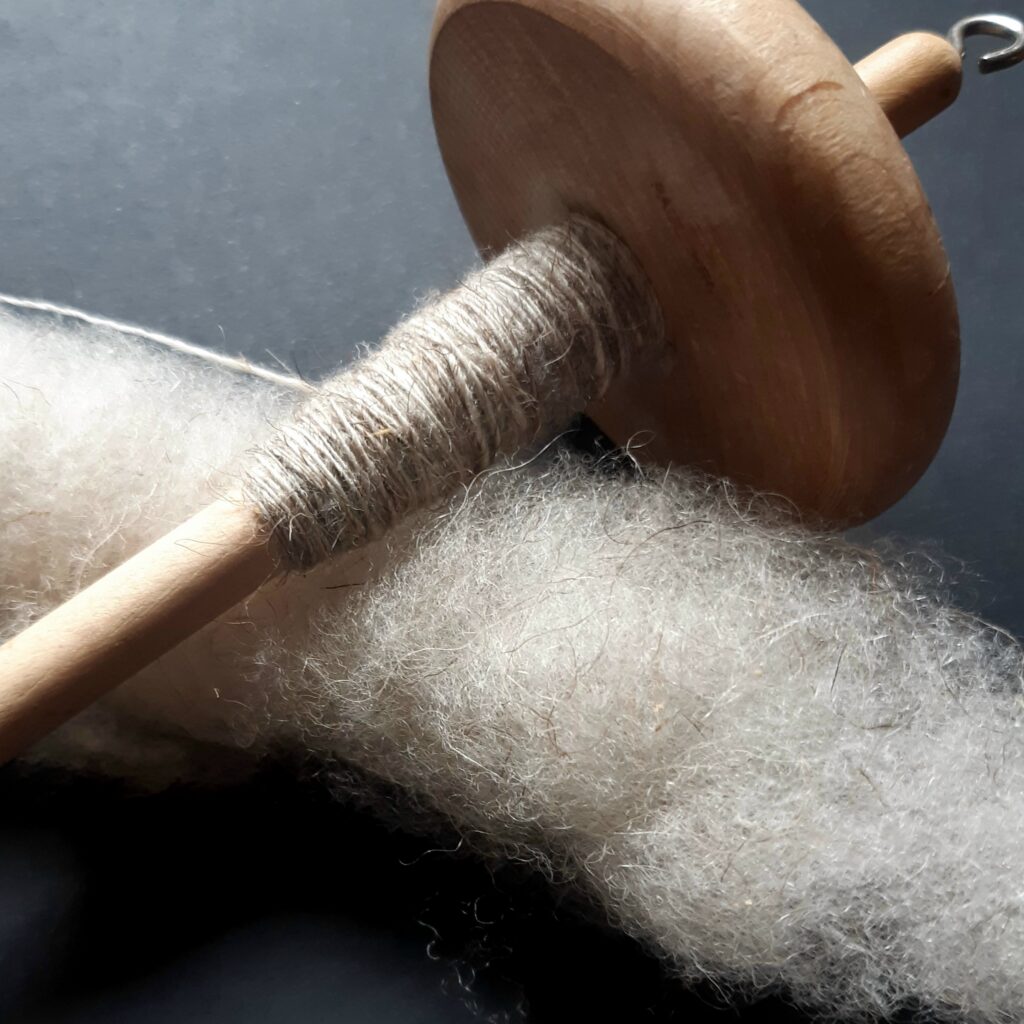
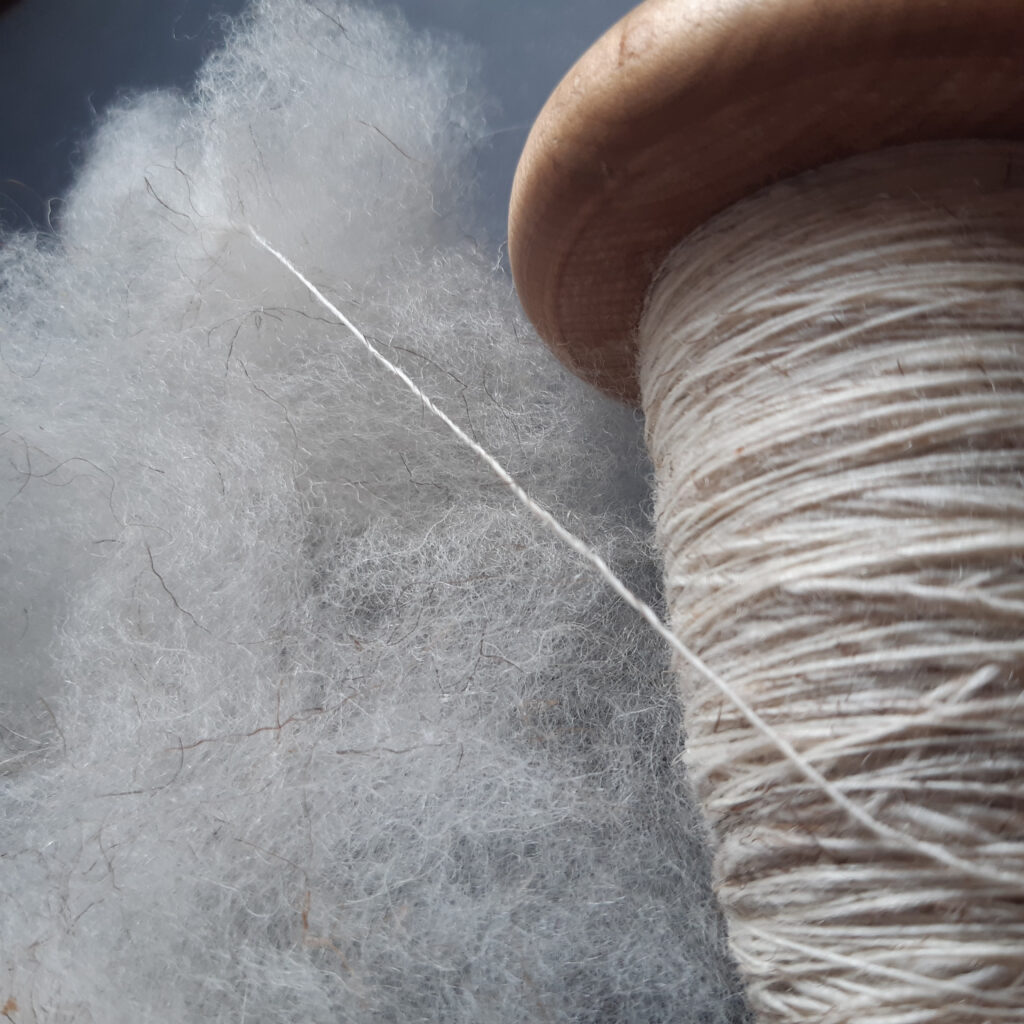
The yarn is being spun as a single as was the original sample tartan, indeed quite often plying wasn’t done, if the single yarn is stong enough then it’s almost a waste to have to spin twice the quantity to ply, albeit you get a more balanced and thicker yarn, but time and effort was very much a consideration. It can take 8 – 10 spinners to keep on weaver busy, so it’s really a valid consideration.


After spinning the spindle is unwound onto a niddy-noddy, tied in 4 or more places and then washed to remove any grease and dirt before dyeing, but also to help to “wet finish” or set the twist.
The niddy-noddy is simply a tool to help organise the yarn by creating a series continuous loops carefully curated into an organised skein but also helps to roughly measure the yardage or meterage, it creates a series of loops carefully curated into an organised skein. Once off the niddy-noddy the yarn curls up because of the spinning twist, but once washed and soaked it relaxes into the well known form of skein or hank.

300 metres singles on Niddy-Noddy with figure of 8 ties to prevent tangles
washed and finished yarn, lovely and smooth and straight with freshly skeined yarn twisted and tight

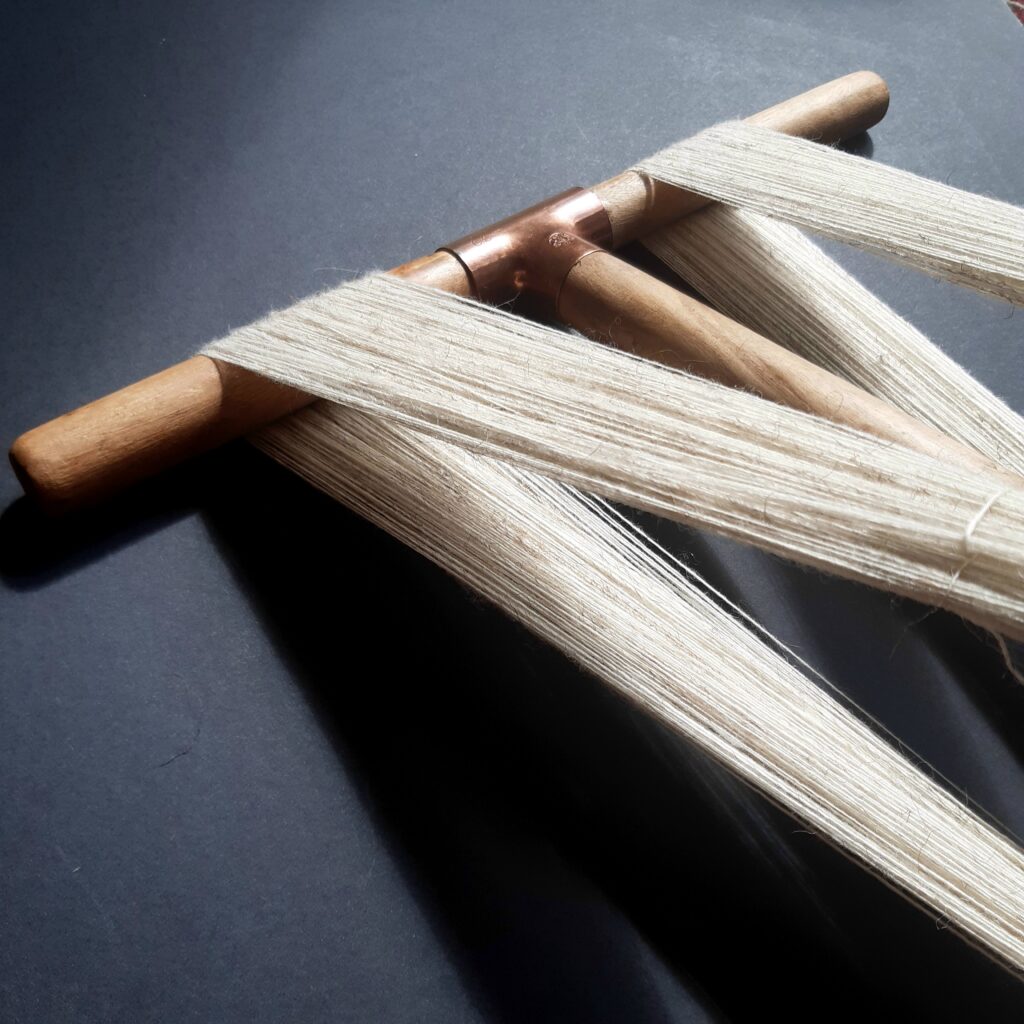
The yarn is now finished, until the next process, either dyeing and weaving, it’s generally better to keep yarn in skeins until it is ready for use, there is less stress on the fibres and easier to see what the yarn feels like and responds to handling.

Processing a raw fleece is a lot of extra work but it is something important for me to feel and touch the fibre, and gives a better understanding of the wool, and every breed is different, and there is a lot of variation even within a single fleece. With careful work it is possible to create a yarn that fits the right criteria for a project. This one I’m only getting about 30% of usable combed fibre yarn for my project, but that doesn’t mean the rest of the wool is wasted, simply it will find a use for another project.

The raw fibre and the finished singles yarn

The remaining fibre will be spun up and then used to create 2 ply yarn, both spinning and plying on the same wheel it’s a perfectly good knitting yarn, it will be a chunky lighter weight perfect for hats and scarves, but I don’t yet have a use for it!

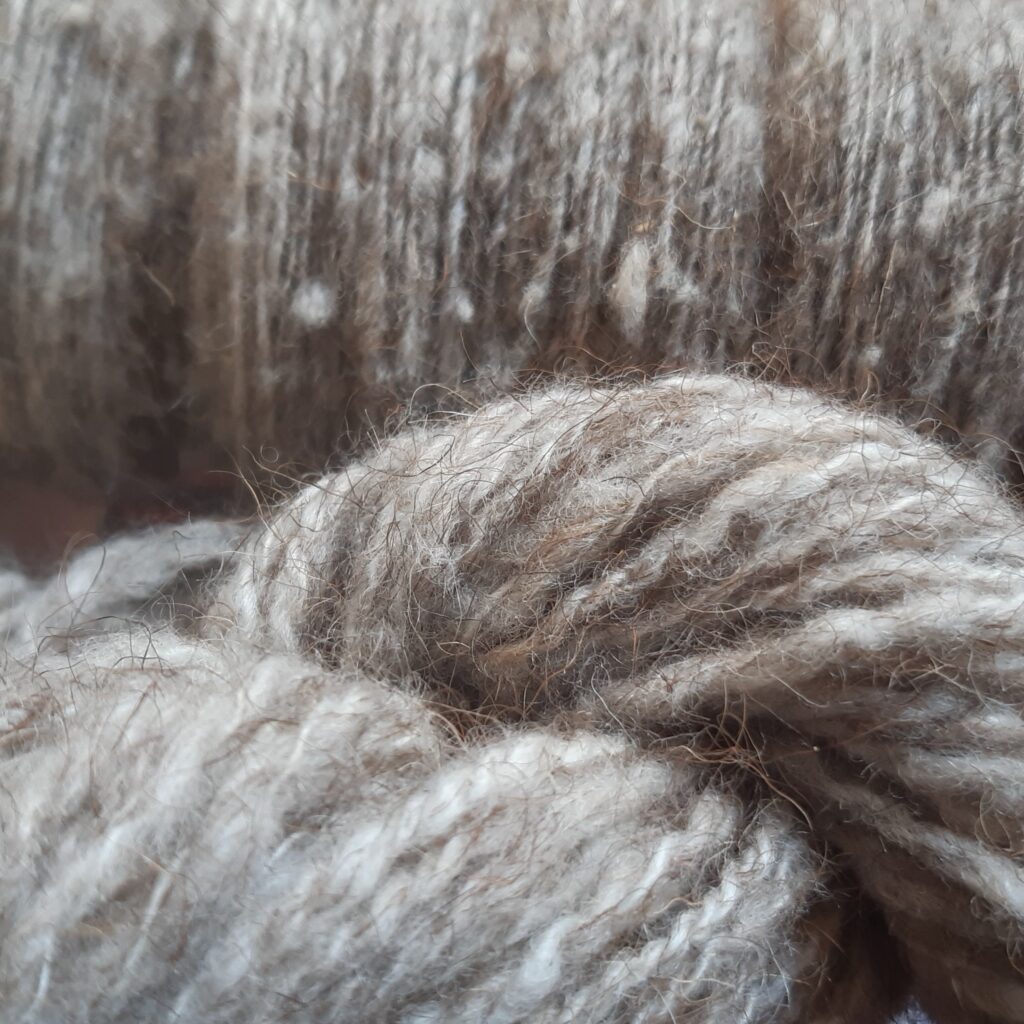
Background are the singles on the bobbin, foreground 2 ply washed and ready to knit, the colour is much closer to the original fleece, a nice light grey brown marl. I will be creating quite a quantity of this one, but every spinner has a healthy stash of finished yarns – just in case the right project comes along, but there is a lot of work to complete on the proper spinning first.

Madder

Madder is one of those incredibly historic dyes that shows up in samples from many archaeological digs all over the world in some form or other,  from Peru in  South America  to Cairo in Egypt to Gujarat in India. It’s often thought to be one of the oldest plant dyes known

Rubia tinctorium and Rubia cordifolia  are the usual botanical names but various species are known by lots of different names, and  they are related to plants such as Lady’s Bedstraw and Cleavers which contain the same colourings although in a much lesser quantity.

Madder leaves

I’ve been fascinated to learn more about this precious resource and find out more about the range of colours/shades/tones that can be produced from this rather uninspiring creeping plant, or at least its roots

Freshly dug roots

It takes about three years for the roots to grow to a good size and are harvested carefully, they break easily and each small piece is capable or growing again, so it is considered a bit of a weed in many places although perhaps in agricultural terms a boon.
The leaves and stalks are full of tiny prickles and can cause allergic reactions in some people. Uprooting can happen at almost anytime, but early autumn is popular as the leaves die back and allow easier access to the roots.

The fine roots are left to dry a few days, then the soil is brushed off and then the roots are washed to remove as much remaining debris as possible

I’ve found it best to cut the roots into small pieces at this stage as when properly dry they become very hard. Madder  has a tendency to go mouldy quite easily so the  root pieces should be dried  as soon as possible, in the sun would be ideal, but in a very low temperature fan oven works very well, turning the pieces often, and when cool stored in a jar where they should keep many years. There is  an understanding that  well aged madder gives better reds, but I’ve obtained great colours from fairly fresh harvests

But now it’s time to dye, Madder contains a range of active ingredients but the chief one is alizarin and can with careful dyeing produce colours from pale pinks and peaches through tans and oranges to tomato reds and bright reds to almost dark maroons and grey purples.
It can be very temperamental to work with  with many factors affecting the colour responses, for example , pH values  – acid to alkali,  to heating for too long or too high,  for hard or soft water, for short or long soaking, for fast work or long slow fermentation. That is part of the frustration but also the magic with many natural dyes, I suspect the charm is in the challenge for the dyer, certainly for me.

I’ve worked with madder on wool in lots of different ways, but a usual ( and almost guaranteed to get some good colours) method  follows.

The wool should be mordanted first using about 15% – 20% potash alum to weight of dry fibre  this is a little higher than for usual mordanting, but the madder needs it to get a full depth of colour. Dissolve the alum in some hot water, add to the pot with plenty of extra water, add the scoured  and skeined yarn and simmer gently for about an hour or so, leave to cool in the pot overnight, I’ve found that removing the skein and allowing it to dry for a few days, or weeks if possible works well, but remember to rinse and soak the skein before any dyeing.
Use about 150% dried root to dry weight of yarn and about  5% Calcium carbonate, madder appreciates hard water.
Soak the wool in clean water for a least an hour or overnight is ideal
Scald the madder roots  and let sit a minute, drain the liquid, and repeat.This liquid will be quite orange, it can be used  to make peaches and light colours, but it is worthwhile to remove the “orange”  dye if you are trying to get  a “redder” colour range. 
This stage isn’t essential but it does seem to speed up the dyeing process.
Put the roots in a large pan with the calcium carbonate and plenty of water, heat very gently for about 30  mins and  the colour will start to bleed out. I add the yarn at this stage, but some prefer to strain the roots off, put them in a net and then replace in the pan, but I find that the pieces of root  don’t tend to stick to the yarn and are easily removed at the end of the dyeing.
Allow to  stay warm for a few hours, very gentle heat is better, but don’t let it get above a simmer and below is ideal. Higher temperatures kill the red and  give browns, perfectly good colours but not the sought after madder oranges and reds.
  I let the yarn sit in the pot overnight, making sure that it is well covered with extra water if needed.
Check the colour next day, if  not deep enough  you can warm for another 3 – 5 hours, this can be repeated for many days and the colour will gradually increase. It is also possible just to let the pot sit for a few weeks without heat , to allow the madder to ferment, this is a good way to get decent reds in a very economic way.
If the yarn still has an orange tint you can rinse the skein in a low alkali solution – I use ammonia or washing soda, but be careful to limit this as it will begin to breakdown the wool if exposed to a strong  solution or for too long, and always make sure it will well rinsed. If things go to plan you should see a gentle change of tone to a cleaner red and less yellow colour.
Conversely  if you give the skein an acid rinse  – vinegar to citric acid – more yellow will show.
You can put the  skein back in the dye pot for deeper colours if wished.
Allow the skein to dry overnight or longer, without rinsing , this seems to help the madder to set properly on the fibres.

This is a  good basic way of dyeing with madder , but there are lots of variations possible and every dyer has their own pet methods.

A few key things to remember, madder doesn’t like to get too hot, it prefers a slightly alkali environment and  it’s quite happy to  sit for a long time, in fact one of the best reds I’ve got was from a skein that  I had forgotten in a dye pot for about 4 weeks, and some people even work with cold madder dyeing over a month or so with excellent results.

fermented madder skein

Other things to note, the smaller the madder is ground the faster the  colouring, I’ve used finely ground or  finely chopped orcomplete roots with satisfactory results, but I find the ground dust is a little harder to wash out.
There are different grades of madder, usually from different parts to the world, some of my most reliable results have been  from Iranian madder pieces, but  my recent tests from London grown madder in school playgrounds has restored my faith in local fresh sources as well.

Modifying rinses is a great way of adjusting tones or tints of madder dyed fibre.
A short soak in an iron rich bath will sadden the original colour making it greyer or duller, with an additional alkali rinse madder colours can turn towards the purples.
Alkalis will make colours cleaner and often accentuate  any red
Acids will tend to warm up colours to a lighter or more golden hue.
Tannins will tend to make thing browner and in the presence of iron  grey to black shades are possible.

With any dyeing it is possible to redye , or to dye several times to enhance or enrich the colour, madder  works well this way, sometimes there is no need to re mordant, but another few days in a fresh dye bath can work well

Madder is a wonderful resource and worth taking time to investigate the incredible range of colours possible, for me wool offers the greatest range, but silk, linen, and cotton is worth a look as well. Cotton with madder needed a curious and very long dyeing process with perhaps over 25 different and subsequent stages, including oil, blood and dung to make the famous Turkey red much loved in India, I’m prepared to give that a miss, for the moment at least.


Local colours from local plants

Following on from an earlier post about collecting local plants and making dyes with them  for a Heritage Open Day, I’ve finished and created a show board

The finished hanging board

The list of plants used, I chose them because they could have been around 1000 years ago, there were dozens of others, but I have left them in the ground for another time

AlderbarkAlnus 
Birchbark‎Betula pendula
CoffeeseedsCoffea
HawthornfruitCrataegus monogyna
HawthornbarkCrataegus monogyna
Queen Annes LaceflowerDaucus carota
AshkeyFraxinus excelsior
Ivy leavesleavesHedera Helix
LichenwholeLichen
Lichen and twigswholeLichen
CherrybarkPrunus
SloefruitPrunus spinosa
Bracken brownleavesPteridium
OakgallsQuercus
OakwoodQuercus
BramblefruitRubus
BrambleleavesRubus
Dock brownseedsRumex
Dock greenseedsRumex
WillowleavesSalix
ElderfruitSambucus
ElderflowerSambucus
ComfreyleavesSymphytum officinale
NettleleavesUrtica dioica


The blurb for the show board 


Wool comes in almost white, almost black, and a light brown, or combinations of, although they can be blended and mixed the colour range is very plain but with careful planing and design there are many permutations . Doubtless by chance the first stains and dyes were discovered which might have been nothing more than coloured earths, but it wasn’t long before leaves, flowers, and barks were used to create a great range of extra colours.

Northern Europe doesn’t have a climate suitable for many of the plants of the tropics,but even with the cooler climes a very worthwhile range of shades and colours were found and used.

I’ve chosen to work with some local plants within a small area roughly centred on St. Johns and extending to the Hogsmill river, selecting ones that are native and would have been known a thousand years ago, and could well have been used to colour local wool. The wool sadly isn’t local but a Shetland wool, and of a type which would have been known then , spun thinly and plyed to make a fine yarn suitable for weaving.

Some of the wool was mordanted with “Alum”, a salt which helps dye colours bind to the fibres leading to better longevity and fastness but it’s not needed for every colour. Modifiers were also used which alter the shade or tone of the colour. One modifier was simply an iron cauldron, the iron acting to sadden the colour, generally making it greyer, although only a small amount is needed as too much can lead to degradation of the wool. The other modifier I used was ammonia, this enhances the warmer colours, traditionally, aged urine was used but I chose to use household cleaning grade instead.

This means that for every plant there are at least three possible colour variations. I’ve been careful about trying to use materials and methods which would have been familiar to a Mediaeval dyer whose sheep could even have been recorded in the Domesday book.

And I must add the watercolour painting that I first saw last year  in the display at the Church which gave me the idea of the dyeing project, just  and because  I noticed the sheep!

St Johns Church dated somewhere between 1847 and 1867, before the Victorian addition