Local colours from local plants

Following on from an earlier post about collecting local plants and making dyes with them  for a Heritage Open Day, I’ve finished and created a show board

The finished hanging board

The list of plants used, I chose them because they could have been around 1000 years ago, there were dozens of others, but I have left them in the ground for another time

AlderbarkAlnus 
Birchbark‎Betula pendula
CoffeeseedsCoffea
HawthornfruitCrataegus monogyna
HawthornbarkCrataegus monogyna
Queen Annes LaceflowerDaucus carota
AshkeyFraxinus excelsior
Ivy leavesleavesHedera Helix
LichenwholeLichen
Lichen and twigswholeLichen
CherrybarkPrunus
SloefruitPrunus spinosa
Bracken brownleavesPteridium
OakgallsQuercus
OakwoodQuercus
BramblefruitRubus
BrambleleavesRubus
Dock brownseedsRumex
Dock greenseedsRumex
WillowleavesSalix
ElderfruitSambucus
ElderflowerSambucus
ComfreyleavesSymphytum officinale
NettleleavesUrtica dioica


The blurb for the show board 


Wool comes in almost white, almost black, and a light brown, or combinations of, although they can be blended and mixed the colour range is very plain but with careful planing and design there are many permutations . Doubtless by chance the first stains and dyes were discovered which might have been nothing more than coloured earths, but it wasn’t long before leaves, flowers, and barks were used to create a great range of extra colours.

Northern Europe doesn’t have a climate suitable for many of the plants of the tropics,but even with the cooler climes a very worthwhile range of shades and colours were found and used.

I’ve chosen to work with some local plants within a small area roughly centred on St. Johns and extending to the Hogsmill river, selecting ones that are native and would have been known a thousand years ago, and could well have been used to colour local wool. The wool sadly isn’t local but a Shetland wool, and of a type which would have been known then , spun thinly and plyed to make a fine yarn suitable for weaving.

Some of the wool was mordanted with “Alum”, a salt which helps dye colours bind to the fibres leading to better longevity and fastness but it’s not needed for every colour. Modifiers were also used which alter the shade or tone of the colour. One modifier was simply an iron cauldron, the iron acting to sadden the colour, generally making it greyer, although only a small amount is needed as too much can lead to degradation of the wool. The other modifier I used was ammonia, this enhances the warmer colours, traditionally, aged urine was used but I chose to use household cleaning grade instead.

This means that for every plant there are at least three possible colour variations. I’ve been careful about trying to use materials and methods which would have been familiar to a Mediaeval dyer whose sheep could even have been recorded in the Domesday book.

And I must add the watercolour painting that I first saw last year  in the display at the Church which gave me the idea of the dyeing project, just  and because  I noticed the sheep!

St Johns Church dated somewhere between 1847 and 1867, before the Victorian addition

Avocado dyeing

A year ago I saw some references to  avocados  giving a delicate pink colour without the use of any additional mordants, relying on the tannin  contained within the stone or skins, I was fascinated and  shortly gave it a test. There were several methods advocated , generally long soaks in water and ammonia mixes  perhaps for several months, or long simmering at low temperatures. I tried a few tests and was  a bit disappointed with the results, pale pinks but nothing that I thought I couldn’t have got with a little bit of exhaust cochineal, so the idea of using avocados didn’t last.

Fast forward about 9 months and I found an old large jar filled with avocado bits and  rather dark red liquid, so certainly worth  using with some yarn. I  made two small skeins of shetland wool, one alum mordanted and the other untreated, soaked them and pushed them into the jar making sure they were well covered and left them overnight, and indeed for a few days. The liquid didn’t feel soapy so I didn’t think there was much alkali left, but I didn’t check the pH.

By chance it was tricolore salad for supper, so I saved the skins and pits , washed to remove any flesh, smashed the pits, let them dry and the next day very slowly simmered them for about 8 hours or so, topping up with water as needed, and pleased to see a very strong colour appearing, almost as much as the 9 month jar.

Another day passed and  tests in the simmered dye bath proved positive for a good strong colour, and when put alongside the fermented bath showed a lot of similarities on the un mordanted skein , but the alum one was a much stronger colour  – not so much pink as a light brick red ( on the right of the picture)

With this revelation I decided it was certainly worth  using the  avocados for a little more research.


Local dyeing

St John’s Old Malden

For a local Heritage Day event, the sort that buildings are open to visitors to look around and explore, perhaps with a guide and with extra historical explanation, I decided that I would contribute to the local church’s one. Parts of it date back to Saxon times, but the bulk of it was  rebuilt around 1611, enlarged in Victorian times, and further enhanced  in early 2000’s. It is situated in a very pleasant churchyard with old graves and a few tombs, surrounded by meadows and fields. The grounds are carefully managed in a conservation way  with a good sprinkling of unusual and special native flowers and fauna. It sits just above the Hogsmill, a tributary of the Thames, it’s largest claim to fame is that it was the inspiration for “Ophelia” by Holman Hunt.

I had the idea that I would create a selection of dyed skeins of wool, showing the range of colours possible even within a small area. I decided that I would have three skeins of each, one as normally, and then the others modified, either with iron or with ammonia. These choices were historically correct, the iron “saddens” colours, making them greyer or darker, and the ammonia helps to make some colour brighter and changes other very dramatically but increasing the pH.Iron could have been introduced by dyeing in an iron pot, it takes very little to have an effect, and the ammonia could have been nothing more complicated than aged urine.

The iron  rinse was made by  keeping iron nails in a light vinegar solution for several months, cooking it up every so often, admittedly not  terribly scientific but it works, and the ammonia was simply a standard household cleaning product rather diluted.

There are lots of other modifiers around but I wanted to keep it fairly simple and reasonably possible for a simple basic dyer of  perhaps 500 years ago.

The first collection, but many more to go, these are mostly spring leaves, but the autumn leaves and twigs will be a little different

I’ve completed the final display board which can be seen here

Tartan edges

Working almost everyday with woven cloth makes you very aware of the type of edge  that you have, ideally making kilts you want to have a finished edge at the bottom of the kilt, but one that isn’t actually hemmed. The  traditional shuttle weaving produced a selvedge ( self-edge),  a term that is widely and also a  little inaccurately used today. A selvedge  by actual definition is the  clean edge formed when the shuttle on the loom goes back and forwards with a continuous and unbroken thread ; this method when carefully managed produces a beautifully pure edge with no added weight of change of feel, it is the most desired edge for kiltmakers.

a traditional kilt selvedge

Of course it isn’t always quite that simple, over the years kilting cloth has been produced on different types of looms and most weavers today use high speed looms which no longer can make a true selvedge. These looms can weave in a few hours what a traditional hand weaver  would have woven in a week or more.  With the change of loom there has been a change of fabric edge.

a tuck edge

The most usual one for kilts is now called a tuck edge where  one thread is woven at a time and then folded back upon itself for about  a cm and then the next thread  is introduced and forms the next line of cloth,  working with a single length  of thread is very much faster and looms use a variety of high speed methods for shooting the thread across including compressed air  or even water, but the key thing is that a shuttle is no longer needed. This edge is slightly firmer and often a little more stable, but it has a little line of  cut threads about 1 cm from the actual edge, these are not terribly noticeable depending on which side of the cloth is used. Most tartan weavers now use this edge for the majority of their production.

leno edge with fringe

Another edge that is sometimes seen is a leno edge, which has a distinctive extra few twisted threads often  white at the edge and a fringe from the uncut weft threads,this is the possibly the faster weaving method but it does mean that any kilt fabric will have to be hemmed. One excellent Scottish weaver has worked out how to have a selvedge  on one side and a leno on the other, they use this on single width tartan and this means that a kiltmaker still has the  chance to use a good edge at the bottom of the kilt, and the leno edge is cut off and used for the waistband, and hidden from view.

While a selvedge is the favourite  it is not always the easiest to produce these days and is now more expensive with only a few weavers offering this. When it is well done it is excellent, but some weavers try  it and fail miserably, this is an example of a rushed and imperfect selvedge, however with a lot of ironing, steam and pulling and stretching it can be made a little better, and if it wasn’t for a special order it would have been returned, a kiltmaker has enough to do without trying to fix  a weaving problem. Often I’d rather have a tuck edge than having to spend time remedying a weaver’s  problems.

a rather poor and imperfect selvedge

Watching a weaver work is a wonderful experience, seeing the magic work of converting a mass of threads into a cloth is fascinating. Traditional looms for weaving tartan  haven’t changed very much in hundreds of years,  a strong wooden box like construction , but actually very simple, relying on the skill of the weaver and a flying shuttle ,it was the only way of producing any from of tartan until the beginning of the 19th century.

Mechanisation happened and the introduction of power looms  made the mass production of tartan possible, dobby looms which followed around the 1850’s  revolutionised the speed  of weaving and the possibility of more complex designs.

It also meant that some weaving could be done at home or outbuildings which is largely how the Harris tweed industry came about, with a benevolent investor many looms were bought and  the local community began to change what was already a low level cottage  occupation into a world wide industry. The looms most associated with Harris tweed are the Hattersley single width looms  many of which are still working nearly one hundred years later. They are wonderful work horses   excellent for the substantial tweeds. These looms do produce a selvedge  but realistically with the heavy yarn it’s not  often usable without a hem for kilts. One edge will be smoothish and the other will have all the carried threads, but as  the tweed is generally for pattern based clothing this presents no problems

traditional Harris tartan tweed with a loopy edge, properly called floats!

One last little nugget; occasionally  I see a thread that has been attached to a length of cloth this tells me that there is a fault of some sort, the thread is always at the edge ( this time a tuck edge)  and the flaw will be roughly in line with it, when the cloth is rolled up it is easy to see how many threads to judge what sort of quality to expect, this is supposed to be the origin of the phrase “no strings attached” meaning that the cloth was good quality and that no extra work was needed to  put it right!

definitely a case of strings attached

nettles

There is a long history of harvesting plants to  extract fibre, the well known ones are  cotton and linen, perhaps hemp, jute, and  sisal , but nettle was very well known and there evidence that it has been used at least for the last 3000 years, and possibly much longer, everywhere from Denmark to Ancient Egypt.

Nettles grow wild and don’t need any special  treatment and survive in almost any soil. They grow tall, up to 5′ and are perennial and self seed  very readily.


Harvesting often takes place in the autumn, stems are cut near the ground and the leaves rubbed off. Gloves are really needed – they are called stinging nettles for a good reason.


The stems are gathered together and left to rett on the ground for a few weeks allowing bacteria to start breaking down the woody parts of the stalks to reveal the valued fibre. The stems are then gently broken and the outer skin can be peeled off and the inner core   removed and disposed of.

It will look like a mass of straw, but this is the important fibre, by scraping, flexing, rubbing between hands, and combing the fine fibres will be revealed, and can then be spun. If there are a lot of shorter lengths carding is probably a better idea, in the same way that rolags are created with wool.

There will still be a very definite green colour on the fibre during spinning and also  shorter random bits of stem, it’s usually easier just to carry on than waste extra time with more processing, as the  little bits will fall out either in the spinning or in the final washing. My favoured spinning is with a drop spindle, it’s easy to control especially for small quantities of fibre.

The fibre is fairly strong, but creating a 2 ply evens out any variations and makes a much more balanced final yarn. It will look fairly coarse with lots of small stem pieces, but they will disappear with the next step.

The skein needs to be washed before it is properly ready to use, it is boiled in a  weak solution of washing soda for  about hour, it’s easy to check on the progress, the yarn will lighten in colour, lots of the stray bits of stem will vanish, and  yarn itself will become much softer. It will need to be washed at the end  with some normal washing liquid and well rinsed, after it is dry , it’s ready to use.

There is a lot of work needed to  gain a small amount of fibre,there is a huge amount of waste, but on the plus side it is essentially free to harvest,needs no special tools to convert the raw stems into fibre and it makes a very strong yarn, being very similar to  flax and linen. I’d  be very happy to make more given enough time, it’s certainly been a very useful project.

pulled stem,  rough fibre,  prepared fibre,  2 ply spun,  final bleached 2 ply


Safflower

Safflower is  often called false saffron, it looks a little like true saffron, and does impart colour in cooking, but little else than that, certainly none of the wonderful saffron  taste. I know that it produces oil from the seeds and can also be used as a dye, but that it is fairly fugitive, so in many ways  really only for something temporary. Another of it’s unusual properties is that with careful pH manipulation it can go from a rather nondescript yellow on wool, to wonderful bright pinks on silk, linen, and cotton. In fact when cotton tape is dyed with safflower the result is “red tape” that wonderful legal  item, that binds important and pressing documents together.

I was given a large pot of  it from a friends travels so it seemed a perfect time to give it a try.

First the petals need to be soaked and rinsed a few times to remove most of the yellow colouring, this can be kept and used, but with so many other far more satisfying  yellows from a huge range of other plants, I’m not sure why you would!

With the washed petals the pH needs to be increased dramatically to pH 10 -11 with washing soda, or any strong alkali, and left in solution for  about an hour or so, the petals will all turn soft and brown, but keep stirring every so often to convert as much as possible. Strain the solution and then add vinegar or citric acid to neutralise  and in fact turn it slightly acid as well  to something like pH 6

The magic now happens, simply use the dye solution cold, no heating required and soak silk, linen or cotton for at least an hour, or perhaps even overnight. No mordant is needed, stirring when you can, or when you remember

The cotton and linen will take on a wonderful clean pink, and the silk a slightly more coral version, wool however barely colours, perhaps if you are lucky a very delicate baby pink.

There is a technique where you  use cotton fabric as a sacrificial /interim method, where after you have got pink cotton, you then re soak it in alkali to remove the pink, remove the cotton, re acidify the bath and then dye silk to get pink. I can’t say if it works, but it’s a clever idea, however  a little bit of cochineal to my mind seems a much easier way of going about getting pink silk, and although it might be a little more expensive there is very little procedure and messing about, and not least the cochineal is permanent as well!

flax to linen

I’ve been involved in a project in London Primary Schools, going in to talk, demonstrate and teach a little bit about drop spinning, using flax that they have grown and processed themselves. It’s part of an initiative by Cassie Liversidge ( http://growyourownplayground.com)  to introduce school children to gardening, growing their own food and generally understanding a little about where food comes from. It’s a wonderful scheme, she has 8 schools under her wing and I think that everyone should look to supporting similar projects in every school.

It’s made me think about the process much more intently, having to work out the best way to cope with  multiple groups of 6 or 7 children all wanting to learn at the same time , and indeed coping with dozens of sometimes random questions, and of course a little bit of crowd control as well. The key really was preparation , everything was ready and a few  ideas in reserve if things didn’t go quite to plan. I was also giving a very quick potted history of spinning from the beginning until now, the small potato on a stick certainly worked well, but of course time and concentration span was short.

I had spun flax before, but it had never had as much attraction for me as wool, but  it was something that I wanted to add to the armoury, and has certainly proved useful not least  in spinning my own bookbinding threads.  However spinning the line flax  proved another challenge, and actually I think I might even have a  not so secret fondness for it now.

For those who are a little uncertain about the  way that flax is grown and processed read on, for others you can skip quite a bit.

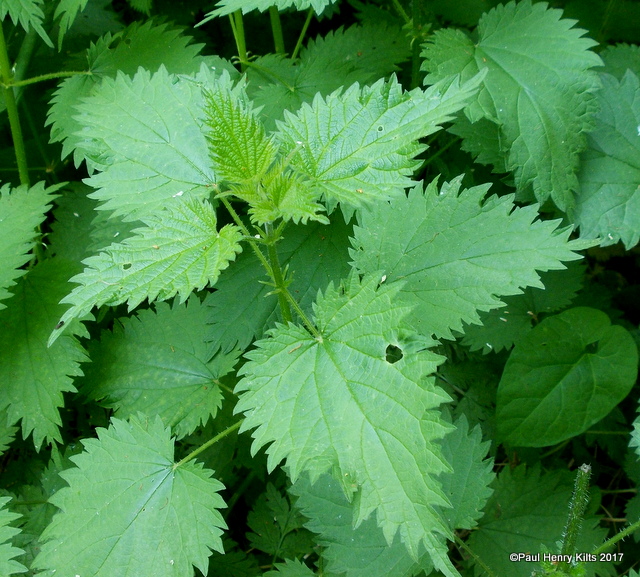
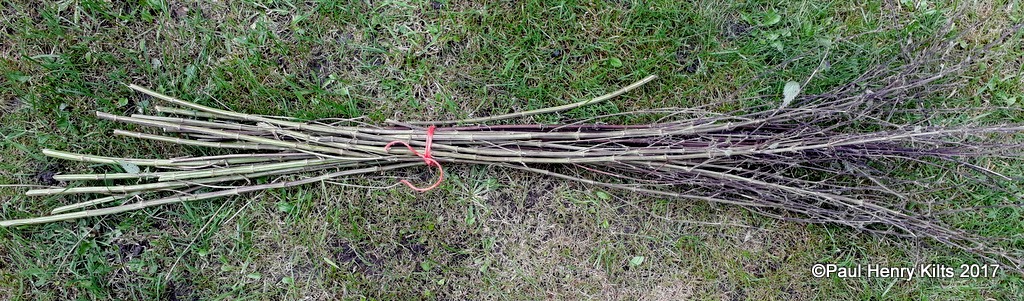
Flax is an incredibly old crop, evidence has been found of  cultivation and use for over 30,000 years, from Russia it spread across all of Northern Europe and to India and China. Growing, it generally prefers slightly cooler climates with reasonable rainfall. In Ancient Egypt most of the prestige cloth was linen and was specially chosen for the elite and the pure. It was very well regarded by the Romans and throughout the Middle Ages was one of the most hard wearing fabrics available. It was the Low Countries that became very well known for the growing and production of flax and in time North America also took to the crop. However once cotton  growing and production  in the 1800’s became widespread the use of linen decreased and by the  twentieth century it had a considerably smaller market share. Today there are still some small scale  flax growers but most of the raw flax now comes from Russia. Flax can grow to about 3′-4′ high and the flowers are a wonderful pale blue, it has a strong single stem which is the essential part of the plant. Harvested at about 3 -4 months after planting, usually  when the seeds are setting, by pulling the entire plant rather than cutting in order not to lose any precious fibre. Leaving the plants to grow for longer causes the fibre to be coarser, but still useful.

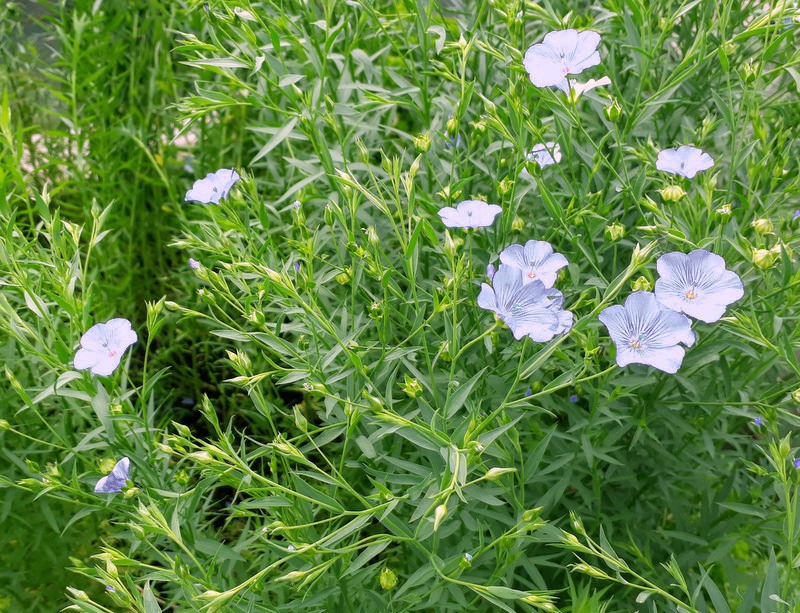
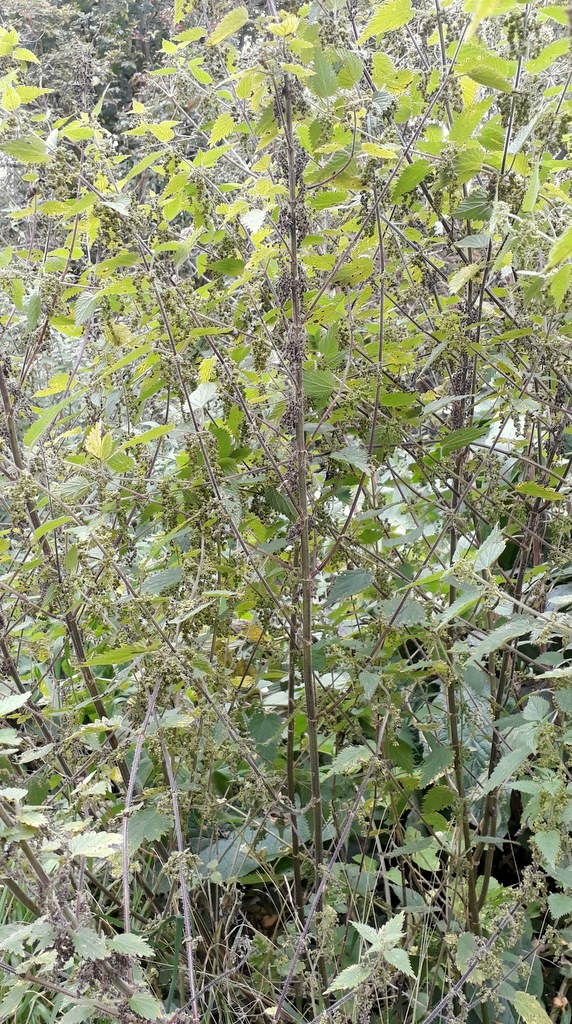
The stems are allowed to dry for  a few weeks and then the seeds removed using a metal comb or rake ( rippling) and saved either for replanting or for use as  food stuff or linseed oil

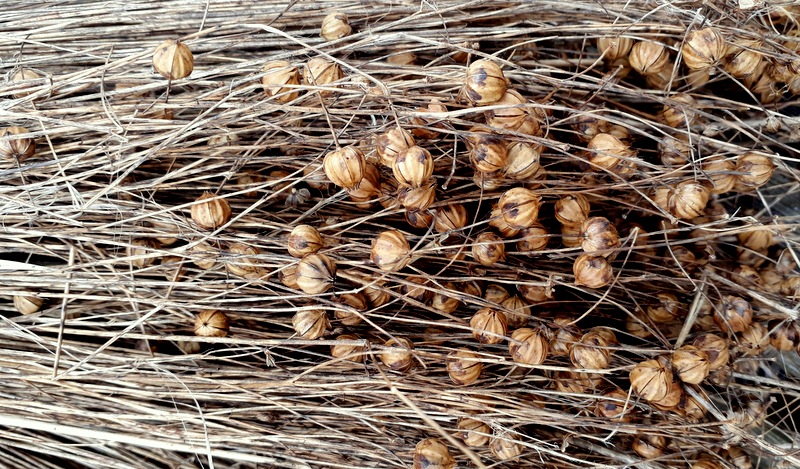
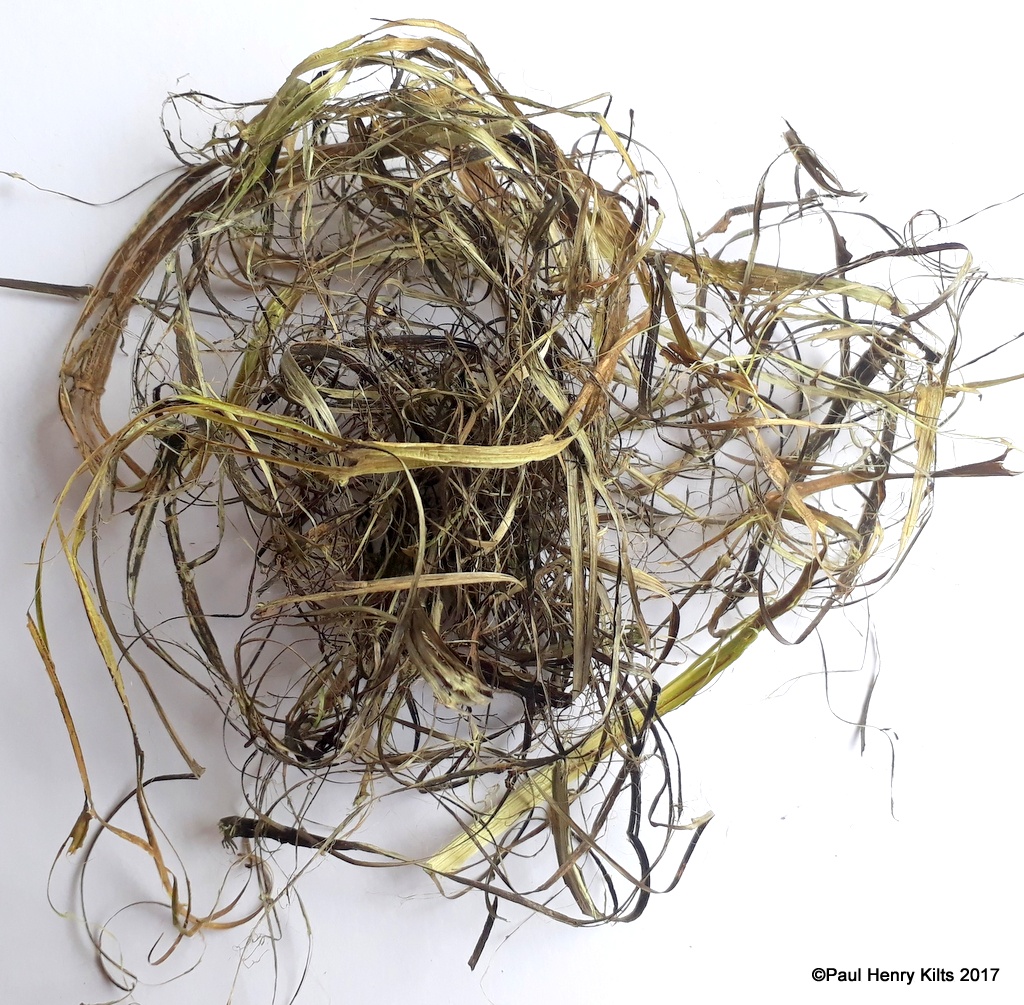
The stems are then  rotted (retted) to help expose the bast fibre,this process normally takes a few weeks and works as bacteria breaks down the outer stem. There are several ways of doing this , but usually  the bundles are left in a pond or a large tub of water, or on wet grass  to dew rett, either way the process is very similar.

Once the stems are completely dry, after days, weeks, or longer the stems are then broken  by squashing, hammering, or  actually breaking and bending the stem (scutching) and the inner fibre is then exposed, the broken stem and core  bits (boon) are waste and the precious fibre  (line) is kept long and straight.

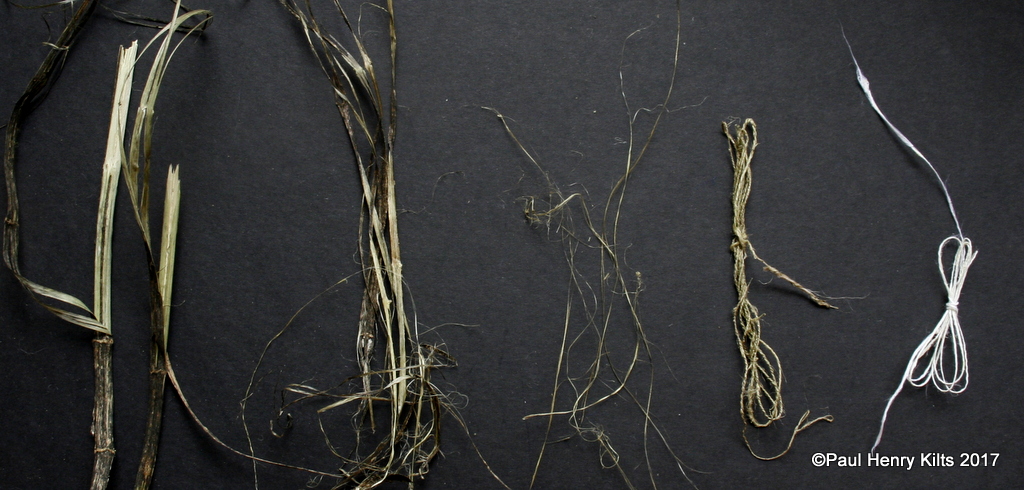
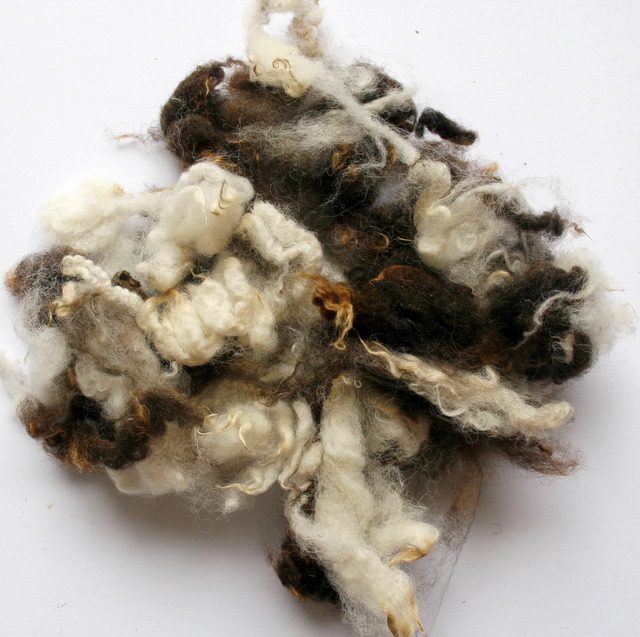
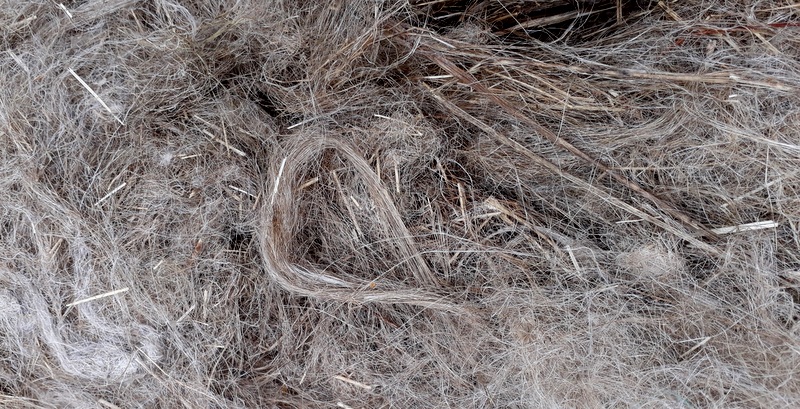
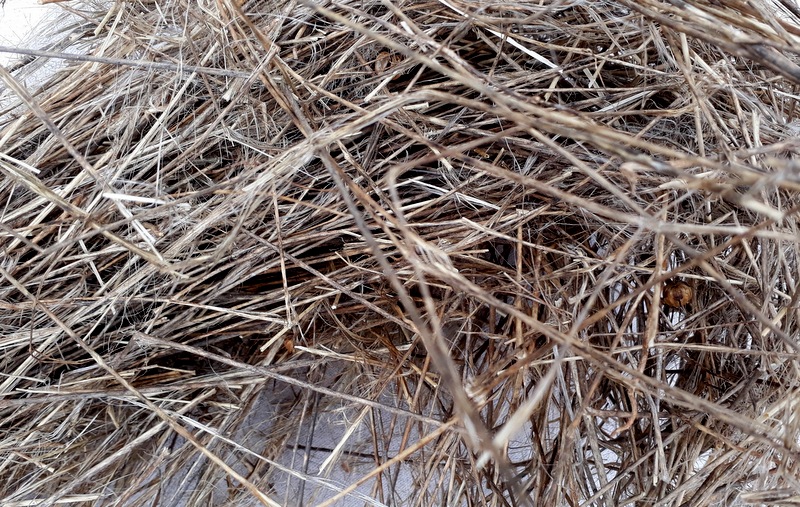
The retted stems look rather dirty and useless , but when broken and the bast fibre is revealed  all the hard work seems worth while.

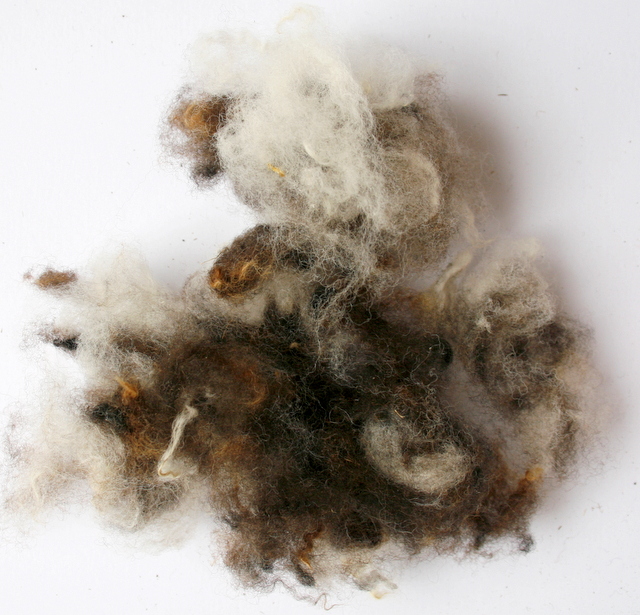
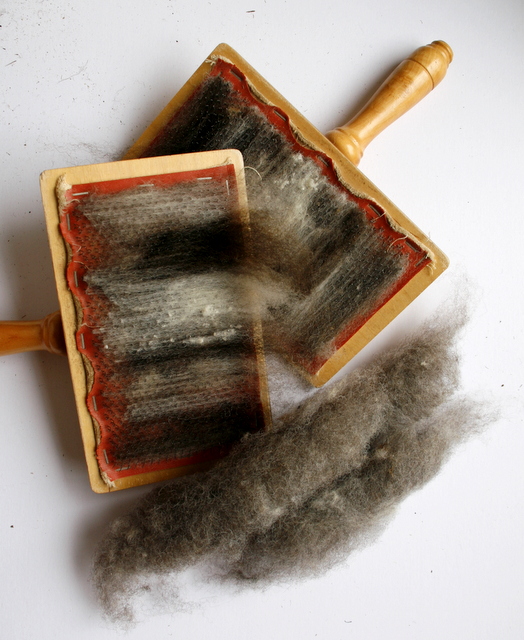
The fibres are then combed (hackled) to even out all the fibre and to help to remove shorter lengths (tow),  which can be re used to make slightly less perfect yarn, but perfect for coarse cloth or ropes.

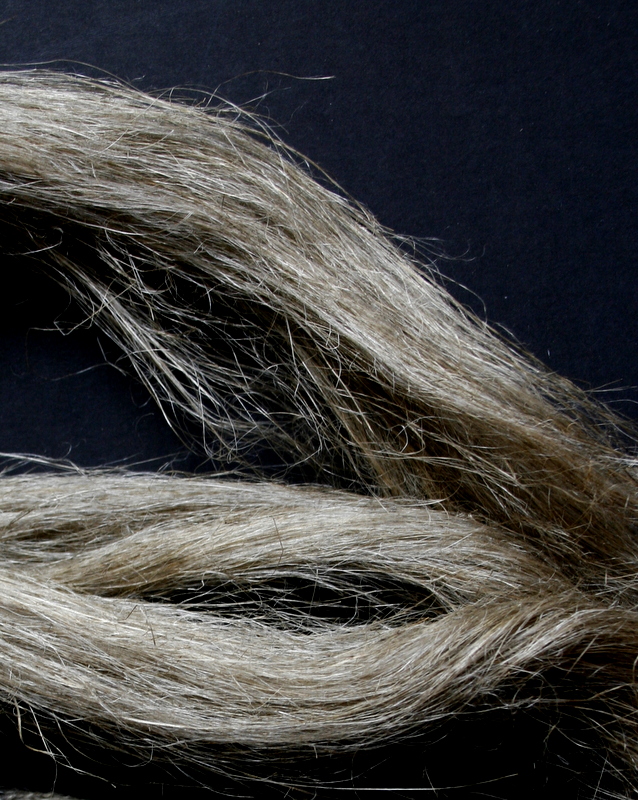
The newly combed hank has a look of horsehair about it, depending on the retting method it can be  grey or golden, indeed flaxen hair is a very appropriate description.

Harvesting the fibre takes a long time and it is hard, messy, and dusty work, it was however fascinating to watch the children working together as teams to obtain as much fibre as they did.

There is always a lot of wastage,about half the weight of the stalk infact, although this can be picked through a second time and the shorter fibres  rescued and used as second best fibre and the remains can still serve as animal bedding, as a mulch, or just to add to the compost heap.

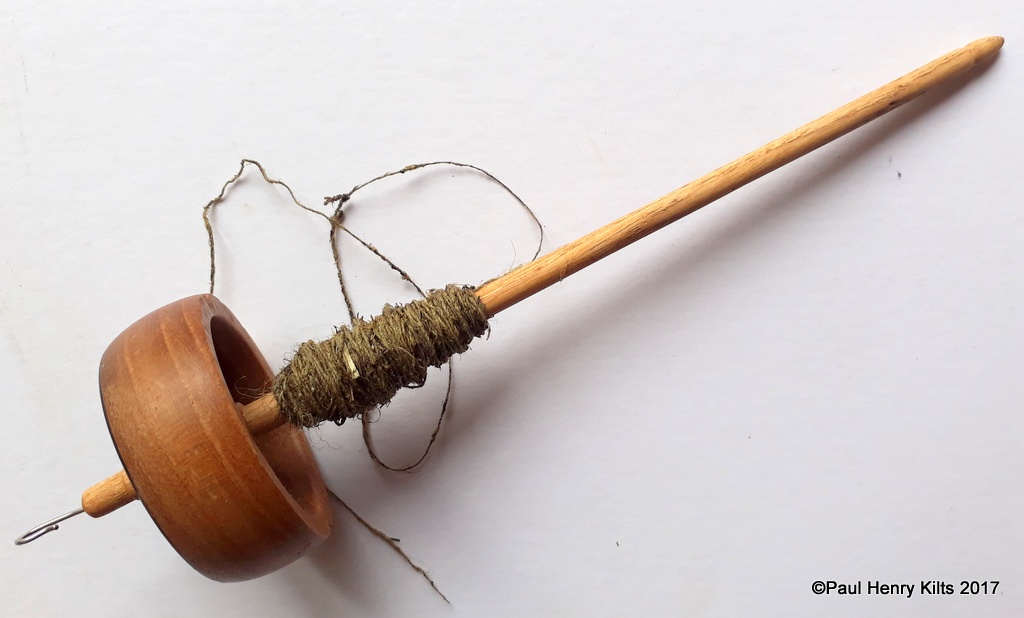
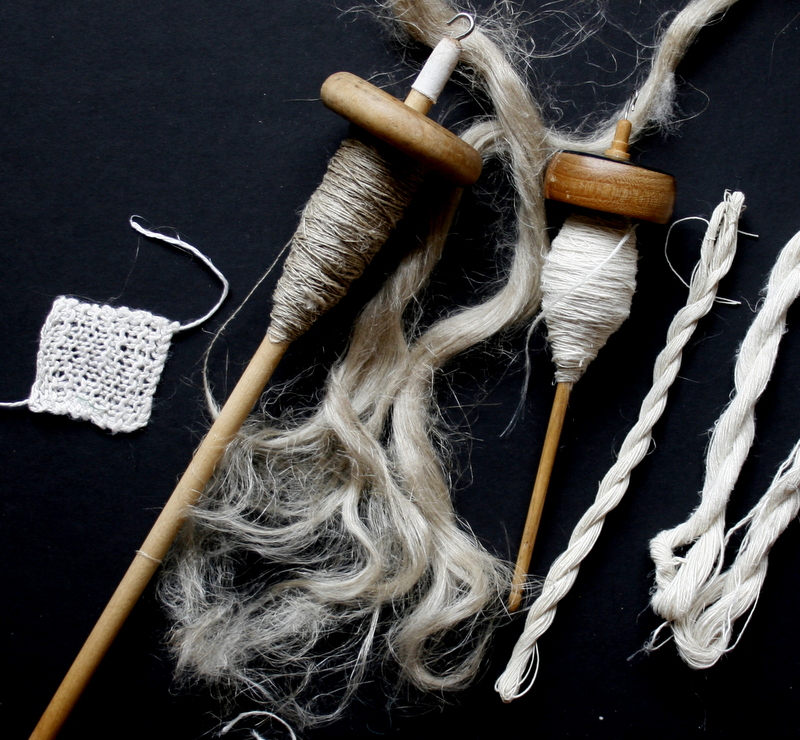
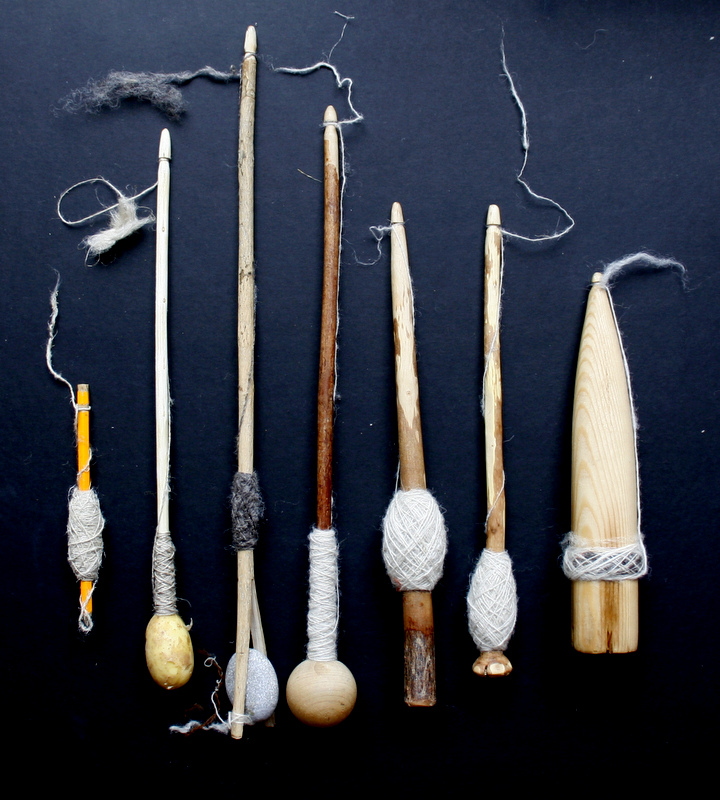
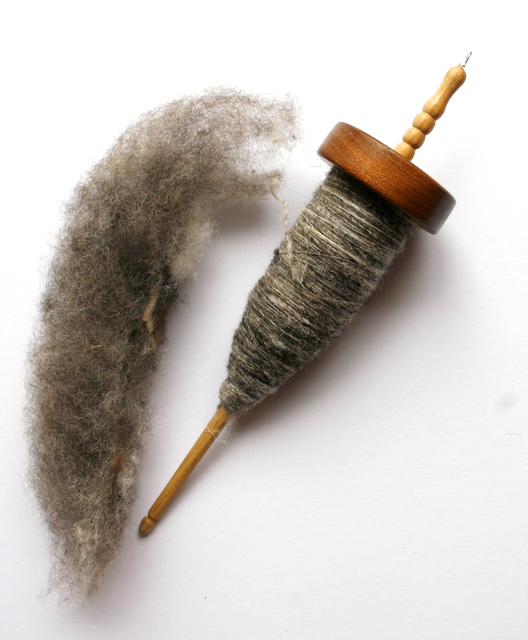
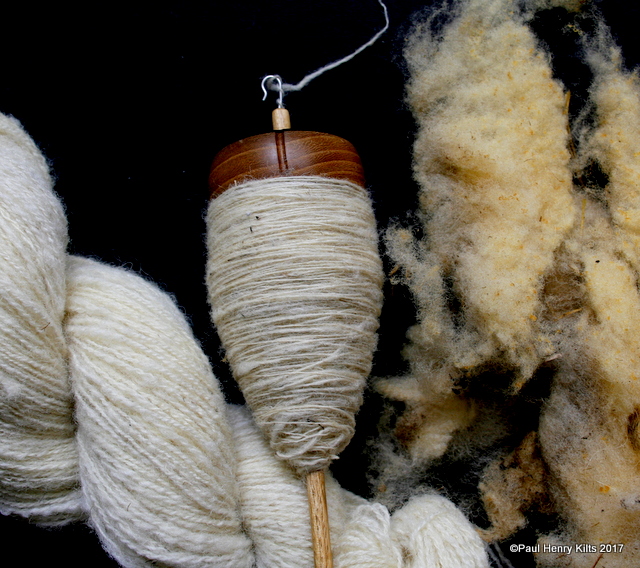
Now comes the  ultimate task, the actual spinning, the bit which I think the pupils found the most demanding. I choose a simple wooden top whorl as I find that is the easiest way to learn to spin, but there is an important sequence to learn.

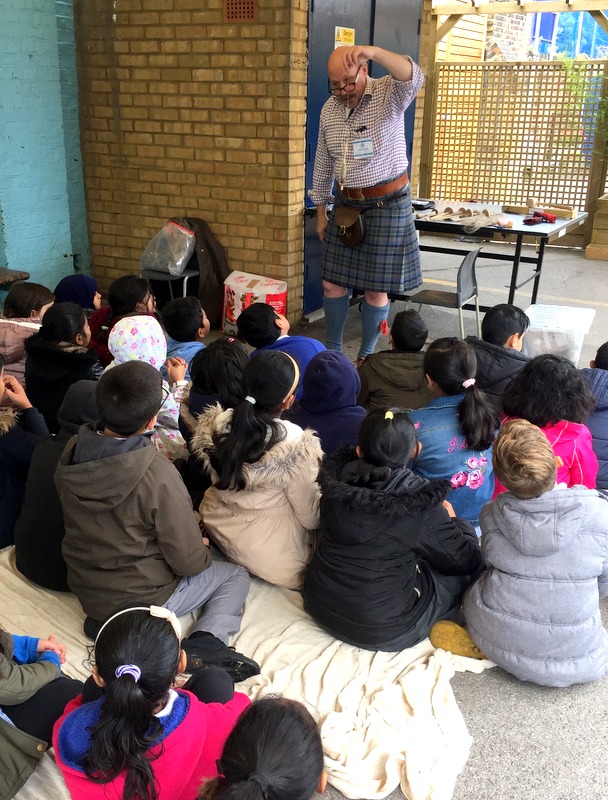
Making sure that everyone knew their left from right, and which way was clockwise took a few moments, and they did need reminding, and generally with  embarrassed good humour. It was important to me that they could  see that spinning was an interesting and fun thing to try, although each session was all about learning, there is a greater chance that some of the information will stick if it is enjoyable.

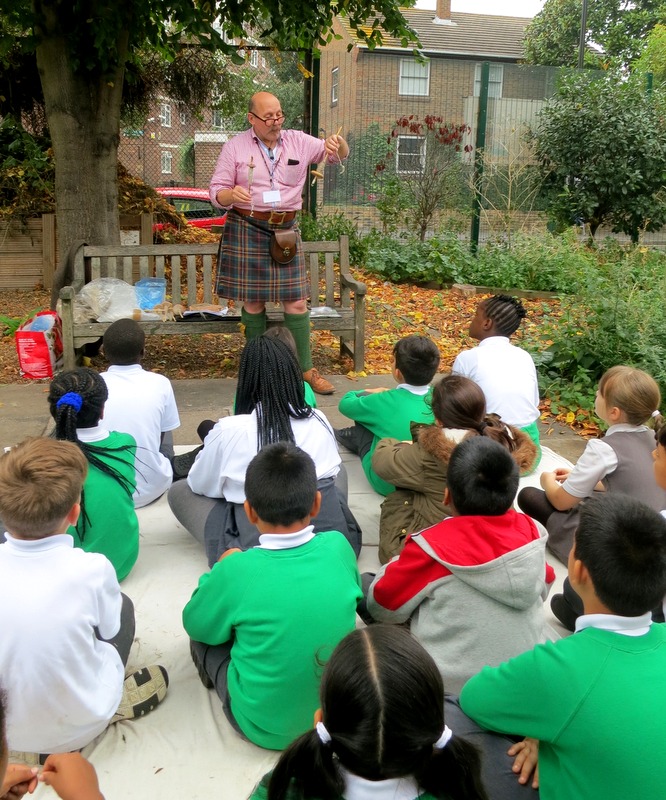
Some of the children did actually seem to “get” the idea, and if I had had  a longer session with them I’m sure that many would have proved very successful. A drop spindle is perhaps one the simplest  and oldest fibre tools and yet capable of creating  fine and coarse threads, they are cheap to make or buy and they can have an indefinite life, they need virtually no maintenance, and seldom go wrong, it is  the spinner who controls the tool, not the other way around.

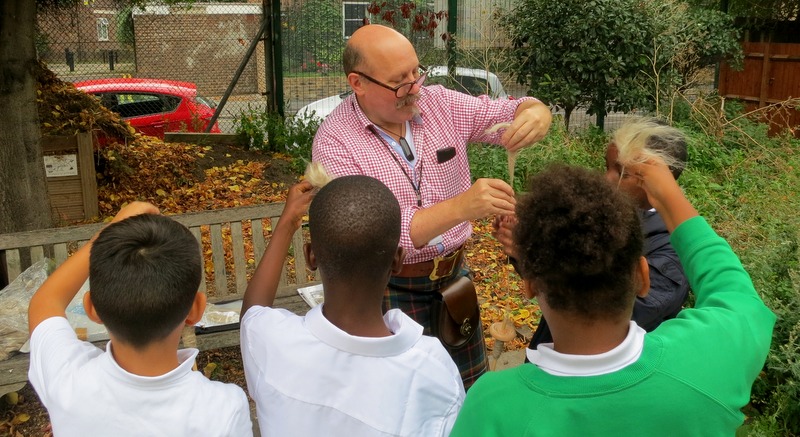
It was wonderful to watch their faces when the soft fibres were turned into fairly hard and strong string like yarn, mouths dropped open in amazement part of the magic that still fascinates me, watching the twist rise up from the drop spindle. Spindles fell many times, breaks in the yarn were mended, but most of them persevered  and they did actually create some linen yarn, and the challenge of turning flax in linen was almost completed.

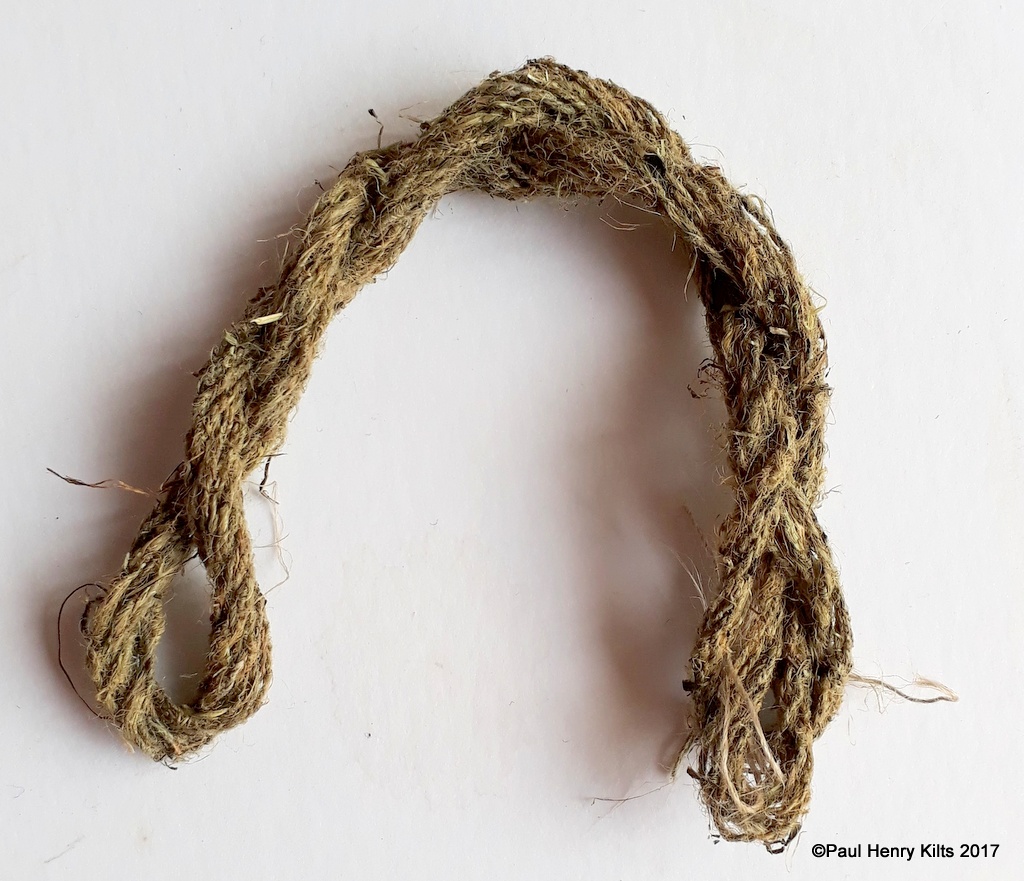
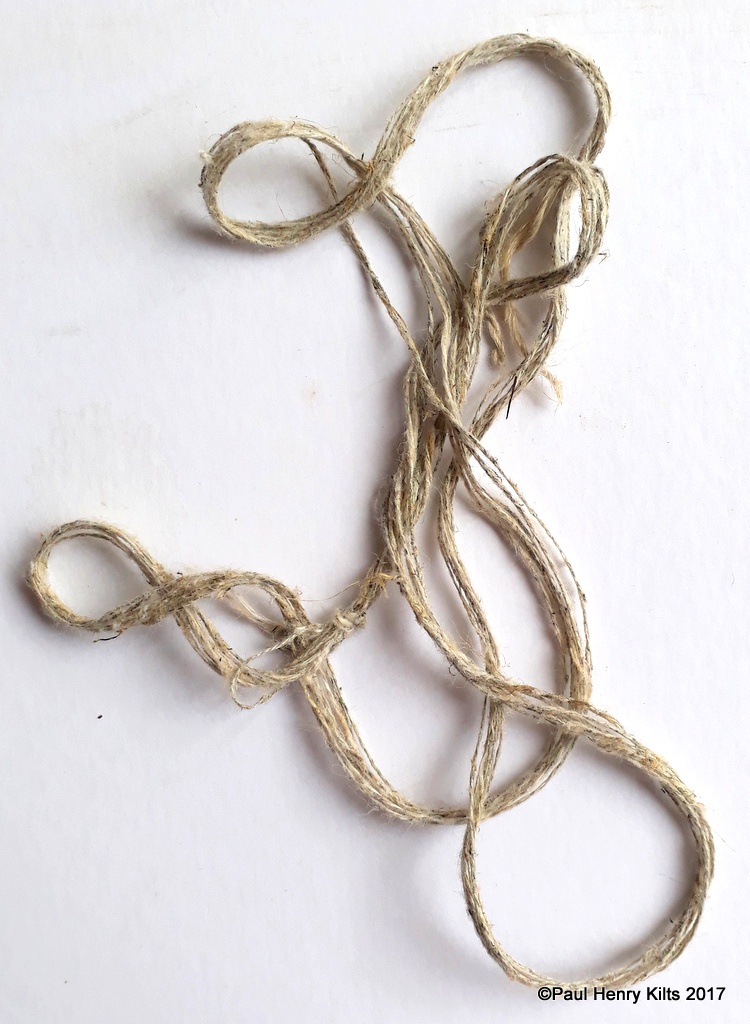
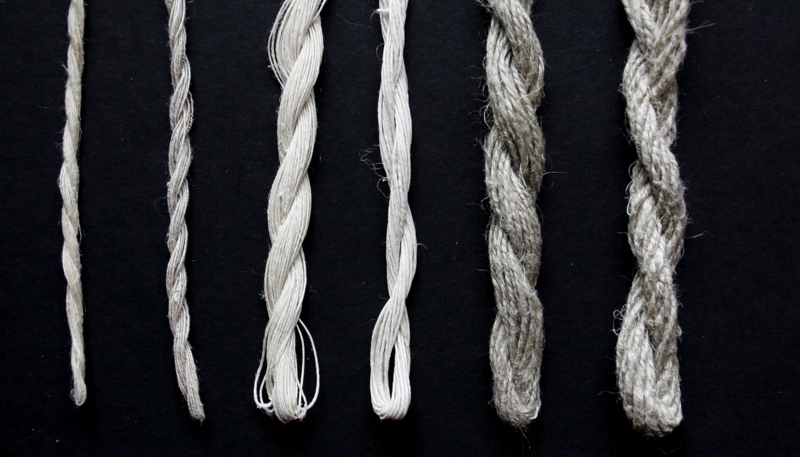
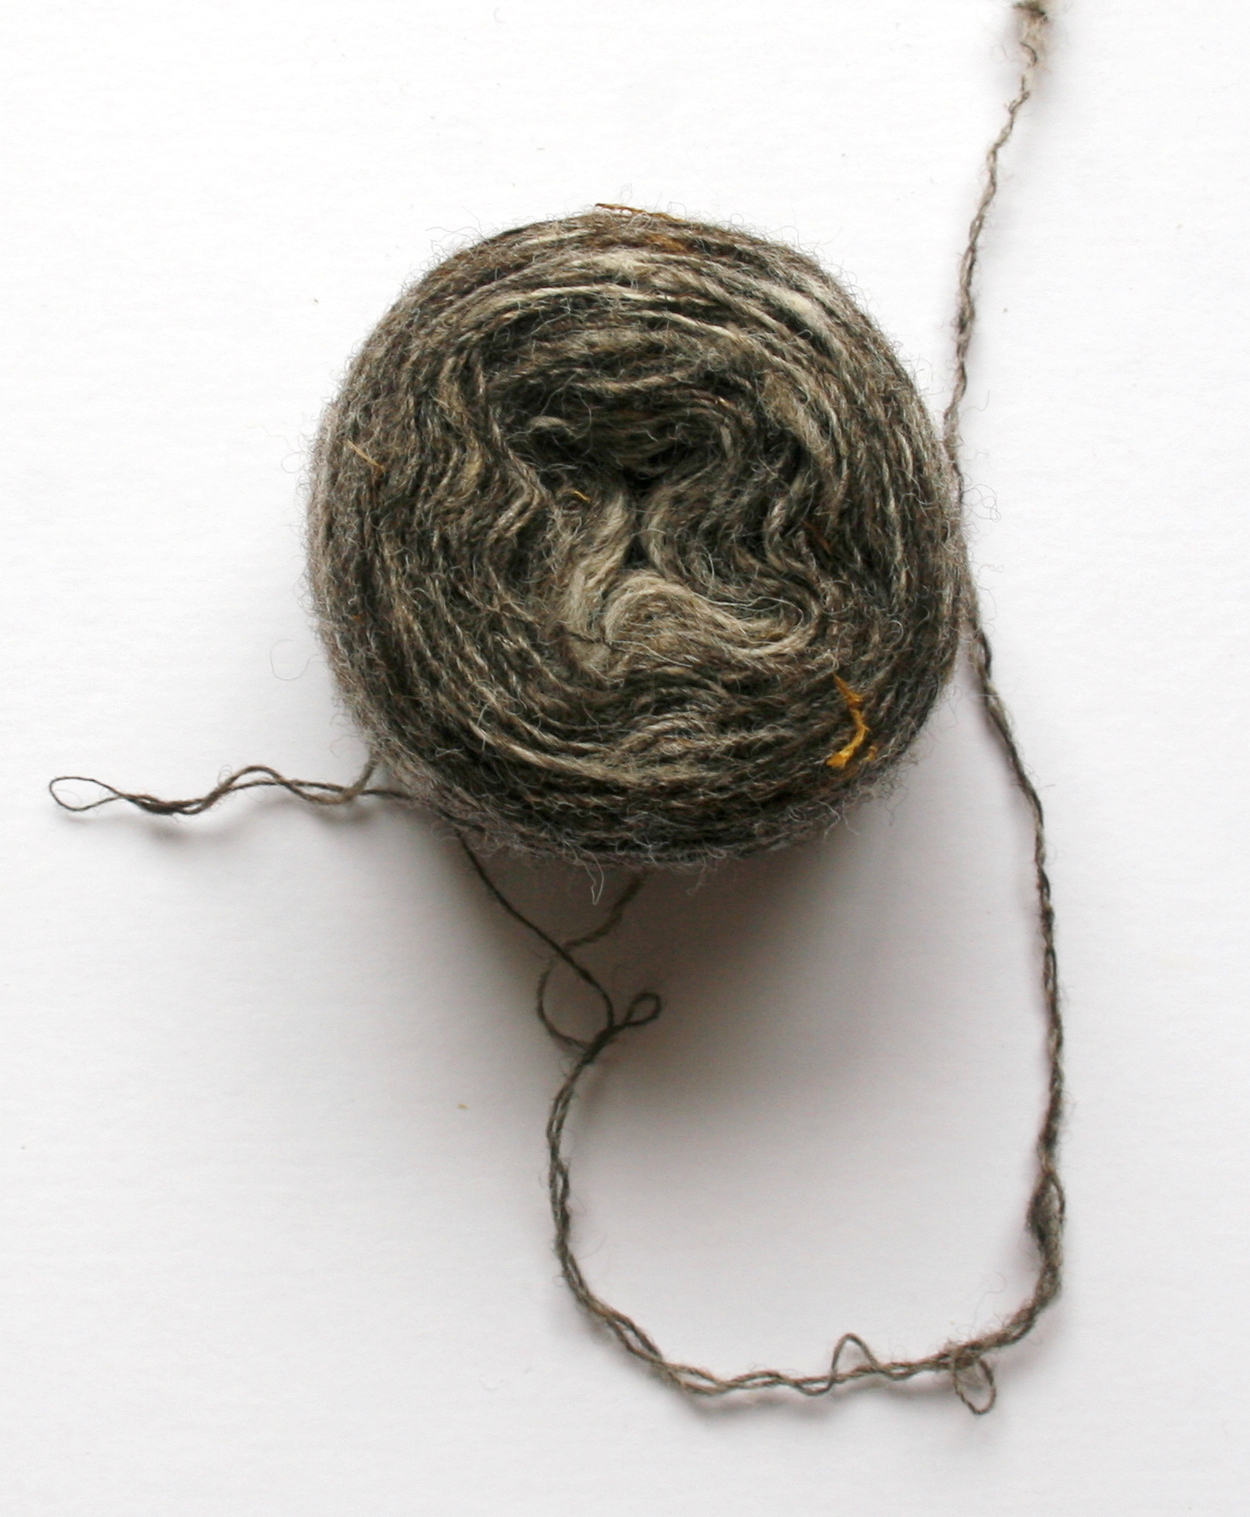
Of course they didn’t produce huge quantities of yarn , but I added to the school production and then plied  two strands together to make a stronger and more even yarn.


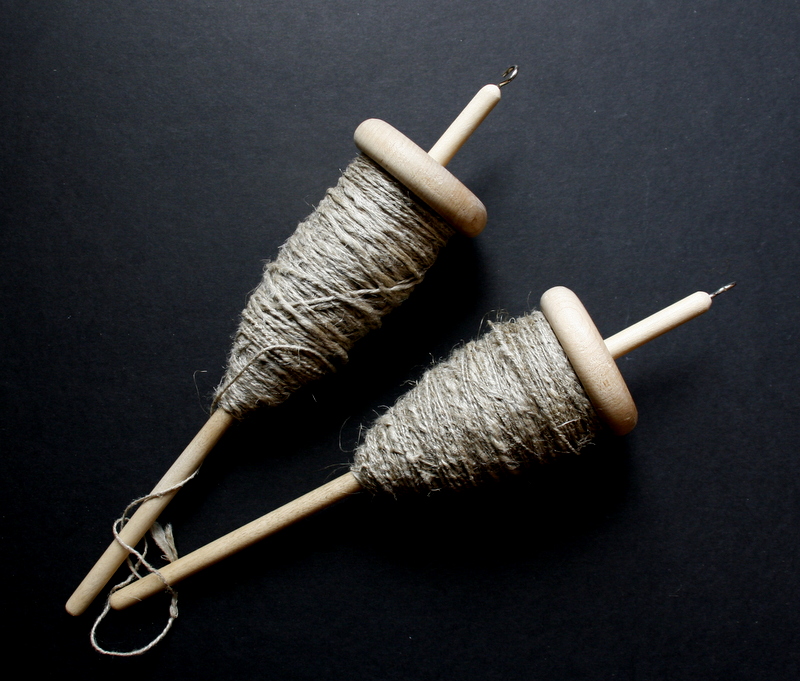
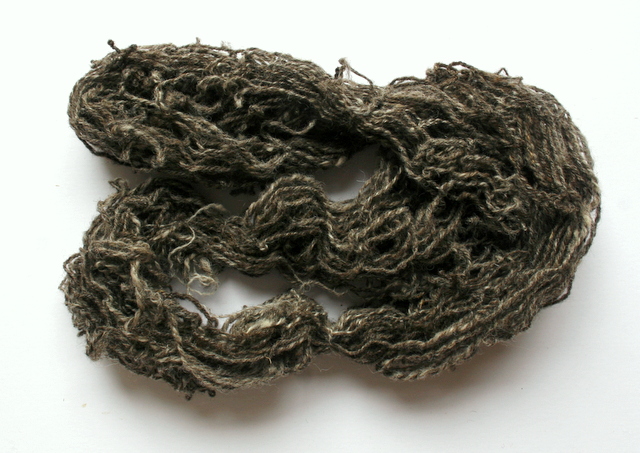
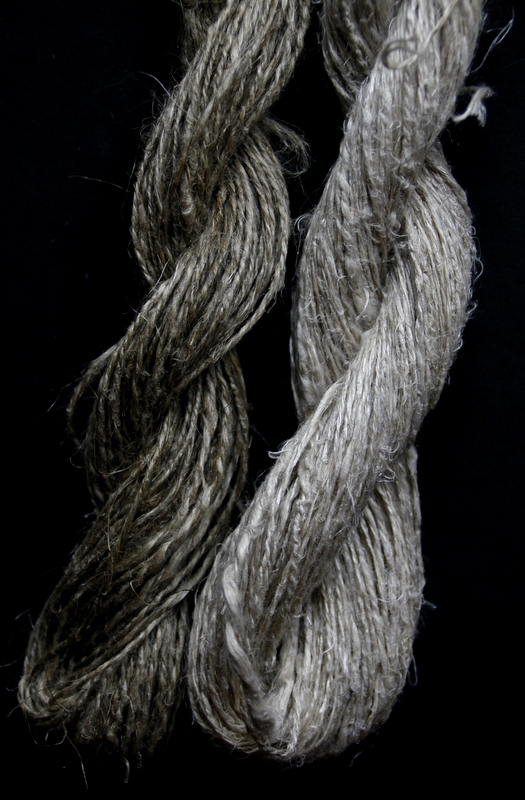
Once  spun the yarn needed to be finished, this meant boiling for an hour with a little washing soda,  which served to  set the twist, remove grease and dirt and soften the yarn, also it did make the yarn a lot lighter in colour as well.


Ultimately the goal was to produce enough yarn from each school to be able to knit a little jumper to display in the school corridors, so with all the extra lumps and bumps in the yarn the children now have something very real to admire, that they have largely been responsible for making.


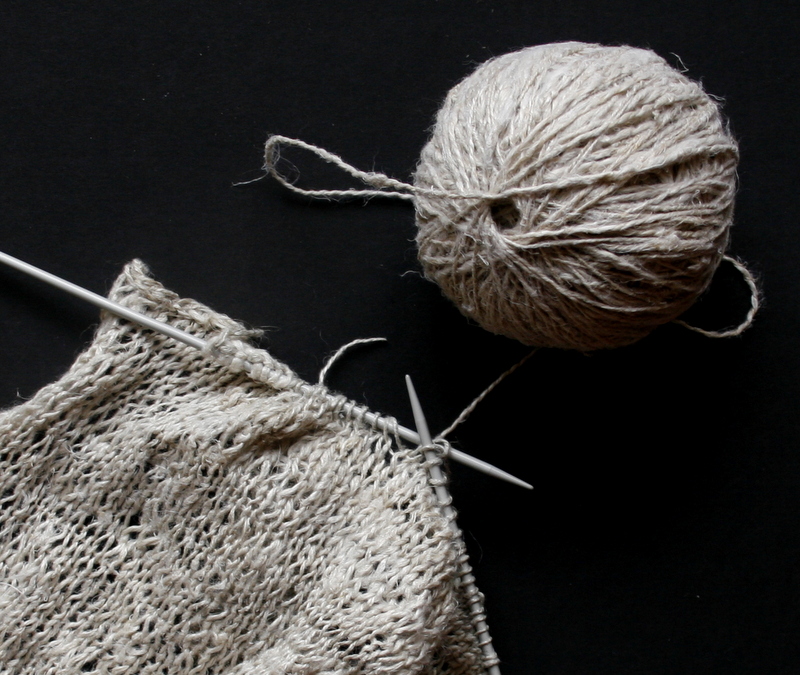
The whole project has been a wonderful experience, tiring  and demanding, but I’d do it all next year I hope!


School children and spinning flax

A few months ago I responded to an online post that was looking for someone who could spin flax into linen for a London school visit, I thought for a moment and decided I’d follow it up. I had done some flax work a few years ago,, mainly to make bookbinding thread, but rather left it behind when wool work took over much of my time. I’m generally happy demonstrating in front of people and  I figured that I wouldn’t get picked as there was bound to be many others  more experienced than I. Much to  my surprise and delight I received a very  positive email, as several exchanges we met up to discuss the details. It was to visit 8 different primary schools in East London , talking and demonstrating about flax and  showing how to spin, it might have been because I use drop spindles that I was picked! The project is one which has been running for a few years enabling school children to grow  vegetables in the school garden, which they tend  and ultimately enjoy a meal or two from their labours, a thoroughly worthwhile project which was developed into growing and processing flax as well : which is where I come in.

I’ve been working on getting a selection of teaching materials together to show the various stages of the process of spinning.

spinning in progress, with both bleached and unbleached flax, on top whorl spindles

I know that there is only enough time to introduce it to the children, and barely enough time to let them have a play as well, but if I have enough samples they will, hopefully,  have an idea of how fascinating the whole spinning process is.

Hand made wooden spindles, all traditional styles made from sticks and twigs, a few stones and even a potato…

I’ll take a few of these spindles as well, jut to show that no magical equipment is needed, in fact the simple things are often best.

from ultra fine singles to heavy 4 ply yarn

I’m not entirely sure what we will end up , but I thought it would be a good idea to have a few samples available so that they can see that a whole range of threads are possible, and suited for lots of different jobs.

Spinning jacob

Jacob fleece might be one of my favourite wools, it is very variable both in quality from fine to coarse fibres and also from pure white through cream to brown and almost black.

I was given a  large bag  of jacob which was remarkably  clean, it had been skirted already but there was hardly any straw or  vegetable matter, it felt and smelt  wonderfully woolly  with a  generous coating of lanolin.

I gave it a quick wash with a little detergent and lots of hot water, a few rinses later and after drying in the sun it was ready to go.

I decided that I would simply spin it as it came, not worrying about separating the colours,  in the hope for a rustic  grey.

The photos should all be fairly self-explanatory, the 3 ply was spun after making a plying cake  with 3 singles  and spun tightly to make a good hard wearing sock yarn

Freshly washed

picked through and locks fluffed up

starting to mix with the carders

a full spindle with a rolag

a cake of singles

3 ply skein waiting to be washed and set

finished skein , ready for knitting socks

travelling and spinning

Some months ago I was given a brown paper feed bag of sightly anonymous  white wool from France, apart from being quite yellow and quite full of vegetable matter I knew nothing about it. I decided that it would be my general purpose wool to  use for my dyeing samples and also my idea would be to spin enough to knit myself a jumper from it. I’ve been washing basins of it instead of cleaning the whole lot in one go, and when I’ve had a moment I card enough to keep me happily spinning.

I’m spinning finely  and then plying it which will give me a reasonable weight to knit up as Fair Isle, which is the plan once  I get around to do some more dyeing.

Finished 2 ply washed and skeined wool alongside freshly spun singles on a very full spindle with the unscoured raw yellow coloured fleece. The spindle holds about 200 metres of yarn.

It’s taking some time to prepare and spin, but I’m in no hurry, I spin when I am able, it’s not a full time occupation for me, which brings me to the title. I’m happy to spin anywhere I can and I usually have a bag of rolags and a spindle in my bag wherever I go. It’s fascinating, for me, to watch people watching me whenever I’m on the bus or the train. I don’t need a lot of space, admittedly a little slower when I am sitting down instead of standing up, but every draft is another few feet of yarn and it soon adds up. There are lots  of surreptitious glances and even the odd photograph taken  by a phone, if only they realised that I would be more than happy to talk to them about the process. Drop spinning to me, even after a few years, is almost magical and the idea that a handful of loose fibres transforms into a  coherent thread is a wonderful thing. When I give my talks on fleece to pleats, I always get a moment of silence when the audience realise what is happening, which is only  further emphasized when I  tell them that it was way all yarn was made until at least 1250, and on some countries the spinning wheel is still a fairly recent introduction. The idea that you can walk  and spin at the same is perhaps the point where most people see how  a stick and a whorl could actually   be capable of producing miles and miles of thread.

So back to my bus journey of a few days ago, I got off  a mile or so away from  home and walked back spinning as I went, in fact walked back happily spinning, a few people looked and some cars slowed down but perhaps I’m already enough of an oddity ,  no comments at all. It did make me realise, that drop spinning on the  go is a perfectly good way of spinning, yes the thread broke once or twice, but thee spindle was easily caught without damage and the thread re-joined. It was a dry day, and a little windy and the spindle did catch the breeze, but it worked so well that I think that perhaps  whenever I go walking in the future I won’t want to miss out on creating  yards of yarn.